Painting for many, can be a scary subject…especially if you are painting doors. I hear most often that people have the toughest times painting their doors, especially their front doors. So today, I put together a tutorial on how to paint a door {like a pro}.

How to paint a door like a pro
Materials needed:
- Zinsser Primer
- Quality paint brush (I prefer Shur-line)
- Quality foam roller (these are the ones I like)
- Floetrol
- Fine grit sanding block
Tutorial:
1. Before you began painting, remove the door handle and then check to see if your door is currently painted. Why is this important? Because, you will need to determine if the door was previously painted with oil-based or latex paint. The rule of thumb is this, you can paint oil-based over oil-based and latex over latex but not latex over oil-based. So, determine which type of paint was used previously and then purchase/use the proper paint this time around. Trust me, it will be much easier if you use the right product!
Tip: To test your door and see if an oil-based or latex paint was used, use some Denatured Alcohol on a test spot. If the paint comes off, it is latex. If it doesn’t, it is oil-based.
2. The next step is to PRIME! Yes, priming is essential is achieving a professional, brush mark free finish. I prefer Zinsser primer. This product will help create an even finish, levels out imperfections, adheres well to glossy paints, and creates the perfect base for your paint, giving you a professional finish.. There are a variety to choose from depending on whether you care covering oil-based, latex, or stain, so make sure to pay attention to the label when making your purchase.
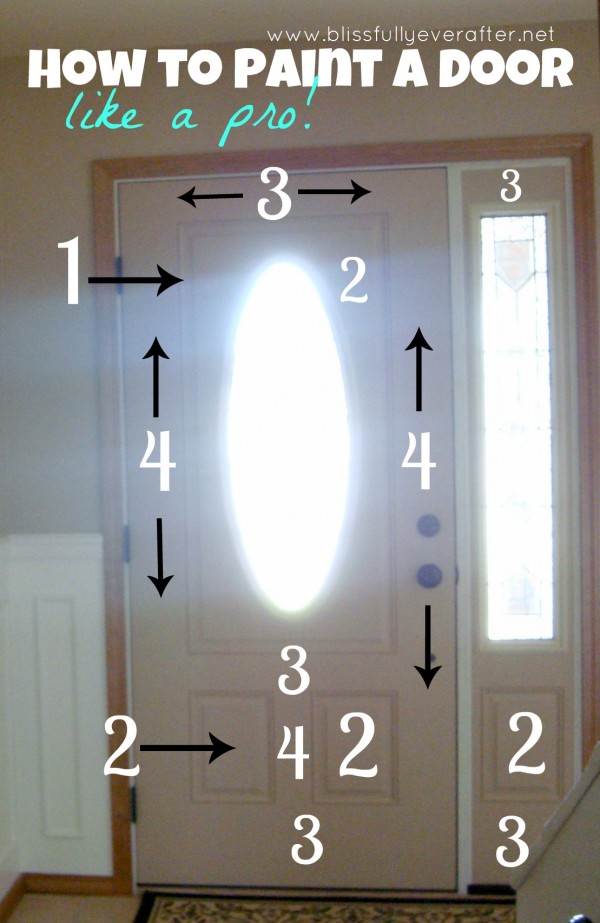
Even with primer, it is important to paint in the right direction to ensure a flawless finish.
3. Here is my guide on how to paint like a pro!

Don’t forget to pin this…you don’t want to forget!
Step #1
Prime all of the “trim” on the door using a good quality angled brush. I like the Shur-line brushes because they give me an excellent finish and clean up easily. Purdy and Wooster are great brands as well. I do recommend using an angled brush though.
Steps #2, 3 and 4
Prime all of the “boxed out” areas of the door and areas 3 and 4 going in the correct directions like the picture above shows using a foam roller.
After the door is all primed you can begin painting. YAY!
Tip: Professional painters use a product called Floetrol which helps to thin out the paint and keep is smooth during application. This is how that professional finish is achieved.
Prep your paint area, mix in Floetrol with your paint and begin apply it following the same directions that you did for the primer. I chose to use a semi-gloss finish since the front door receives a lot of love and I wanted the paint to hold up well. The color we used is called Kettle Black and it was actually a primer/paint in one from BEHR’s premium paint line.
If you notice brush marks or roller marks at all during application, just use a fine grit sanding block and lightly sand the door in between coats. You will probably apply 2-3 coats to achieve a great finish.
Let paint thoroughly dry {you may have to install the door handle in between drying times and applying coats, so just be prepared for this} before installing door hardware.
Lastly, stand back and enjoy your beautiful work and new door!
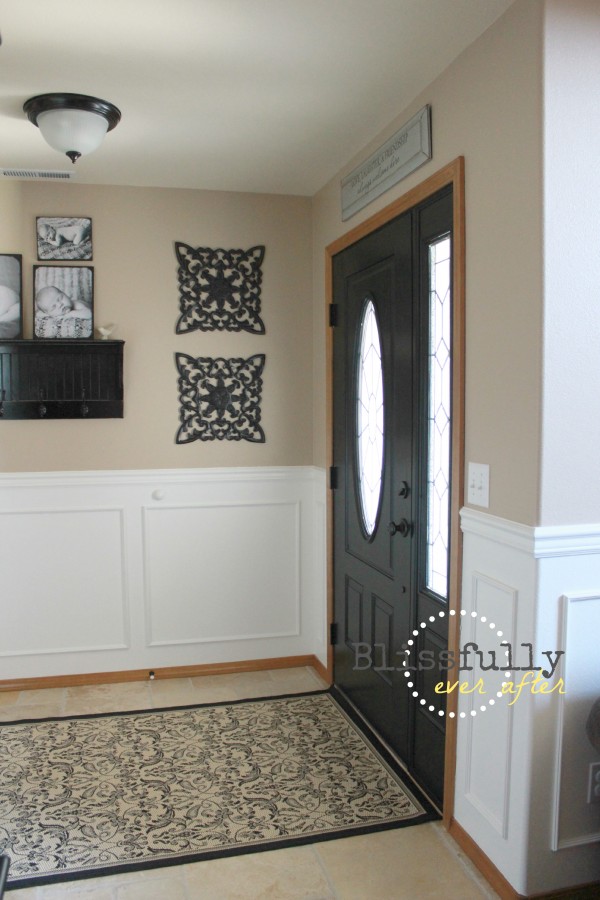
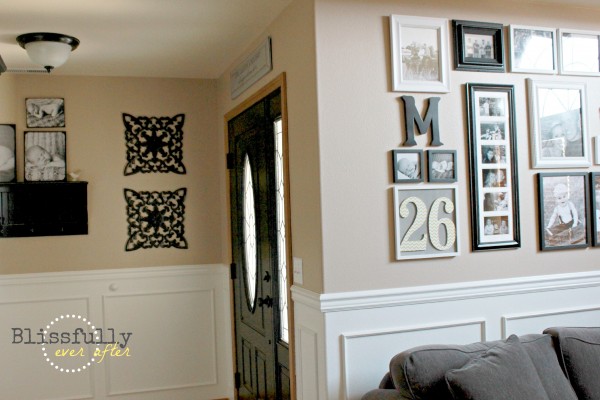
Here is how our painted front door turned out….


I hope you found this tutorial helpful! Are you planning to paint your front door any time soon? If so, what color? If you have questions about this tutorial, please feel free to leave them in the comments below.
Hope you have a great day!

This post contains some affiliate links, for your convenience. Click here to read my full disclosure policy.
I’m so happy to see this tutorial. My husband started painting our door without priming though and there are drips all over the door. 🙁 I suppose the only thing I can do for that is strip the paint off the door and start over, right?
You can strip it or try sanding it down. That’s a bummer, but at least now you have this great tutorial from Jennifer! 🙂
Thanks, Jess! What I recommend is taking a sanding block like the picture I showed in the tutorial and sand over your entire door. If you need to you can use a heavy grit sanding block or paper to go over the drips. After ensuring all of the door is smooth, wipe it down with a damp cloth to remove any paint dust and then follow the tutorial above. Hope this helps!
I LOVE this Jennifer! I wish I had known this before I painted my front door. Thanks for the great tutorial!
Anna
Thanks, Anna and you’re welcome!
I want to paint the exterior of my door. Do I use the same guidelines that you gave for painting the interior? Thanks!
Yep! Good luck! 🙂
Yes, Carol, Anna is right! You can use the same tutorial for the exterior. However, we used a Satin paint on the exterior of our front door vs. a semi-gloss. I received this tip from a professional painted because with less sheen it blends better with the paint on the house. However, it is ultimately up to you on what sheen you pick depending on how much use your door gets and if you have harsh weather, etc. Hope this helps!
Hi! I’m with Carol Jane — I, too, need to paint the exterior. Actually, rather than paint, I’d love to varnish it. Any tips or good places to go for info? This whole project terrifies me, but it must be done! Thanks for a great post, Jennifer and a great blog, Anna!
Sara, what material is your door? This can make a HUGE difference! Once I know this answer, I can help you find out exactly what products to use. Thanks!
thanks for the tutorial! Quick question, if you are using a primer and paint in one, can you skip the priming step? Thanks!
Hey Erin! Great question. Although this may seem like a good idea, I do suggest to use a primer first. I know this may sound like extra work but I have tried using just the primer/paint in one without a primer first and it actually took more coats than normal because the paint didn’t seep into the door enough on the first coat. Now, maybe if you try lightly sanding the door beforehand that paint would adhere better, you could give that a try. Let us know how yours turns out. Thanks!
Good morning! I wanted to let you know that I featured this on my “What I Bookmarked This Week” post this weekend. Stop by and see!
Awesome, thanks Danielle! I think Jennifer will be excited! 🙂
Perfect….just what I needed to finish my kitchen.
Hi Jennifer, Is there another cleaner besides Basic H but like it that I could get at Lowe’s?
Hi there!! Thanks for the great advise!! My front door is metal, do I still follow this process? Also, my paint is also the paint/primer in one, with the ‘absorb’ factor gone, do I still need a primer coat? Thanks for your advise!!!
Jennifer, thank you so much! You just saved me from crying! I saw this a month ago and pinned it knowing I’d be painting my door. Your diagram and instructions just saved my house from drama and tears today. Thank you. 🙂
I just pinned this today because of the huge shelf with hooks on the wall! I need something exactly like this. anyway to find out where it came from?? 🙂
Did you make that shelf with hooks by your front door, or did you buy it somewhere? I love it.
Lovely job Jennifer. Why didn’t you paint the baseboard and door trim white? Seems a bit unfinished now.