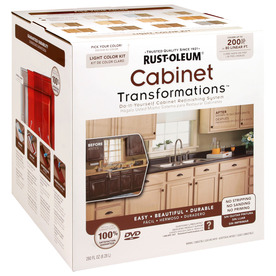
As I do with all major projects I began researching the best kitchen cabinet makeover ideas. I was lucky enough to stumble across this post over at Posy the Porcelain Pig. She mentioned Rustoleum Cabinet Transformations and from her before and after pictures I was convinced that this was the product for me!
I headed straight over to Rust-Oleum’s website and read every detail about their new Cabinet Transformation kit. Here’s what I found on their site:
“What exactly is Cabinet Transformations(TM)? Quite simply, it’s a do-it-yourself cabinet refinishing system that creates a premium finish at a fraction of the time and cost of cabinet replacement. Forget about messy demolition, over budget contractors and weeks of disarray in your home. Easily, you can transform your cabinets to match the kitchen or bath of your dreams.
There’s no stripping, no sanding and no priming. In fact, Cabinet Transformations(TM) is so easy, in just a few simple steps anyone can create the custom look of a new, factory-like finish on existing cabinets.” (http://cabinets.rustoleumtransformations.com)
No stripping, sanding or priming, I was sold!
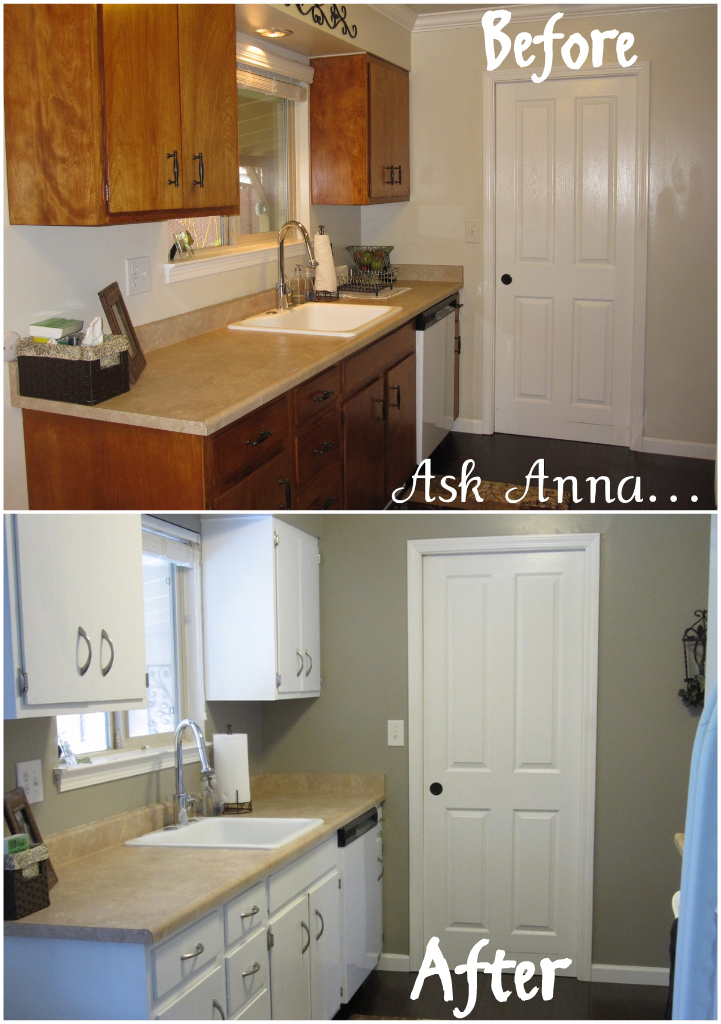
From looking around their website I discovered that for only $149.00 ($79 for a smaller kitchen) I could paint my cabinets pretty much any color I wanted, but I had my heart set on white. Our cabinets are 45 years old, dark, and in serious need of an update so I thought that a bright white would be the best way to modernize them a little.
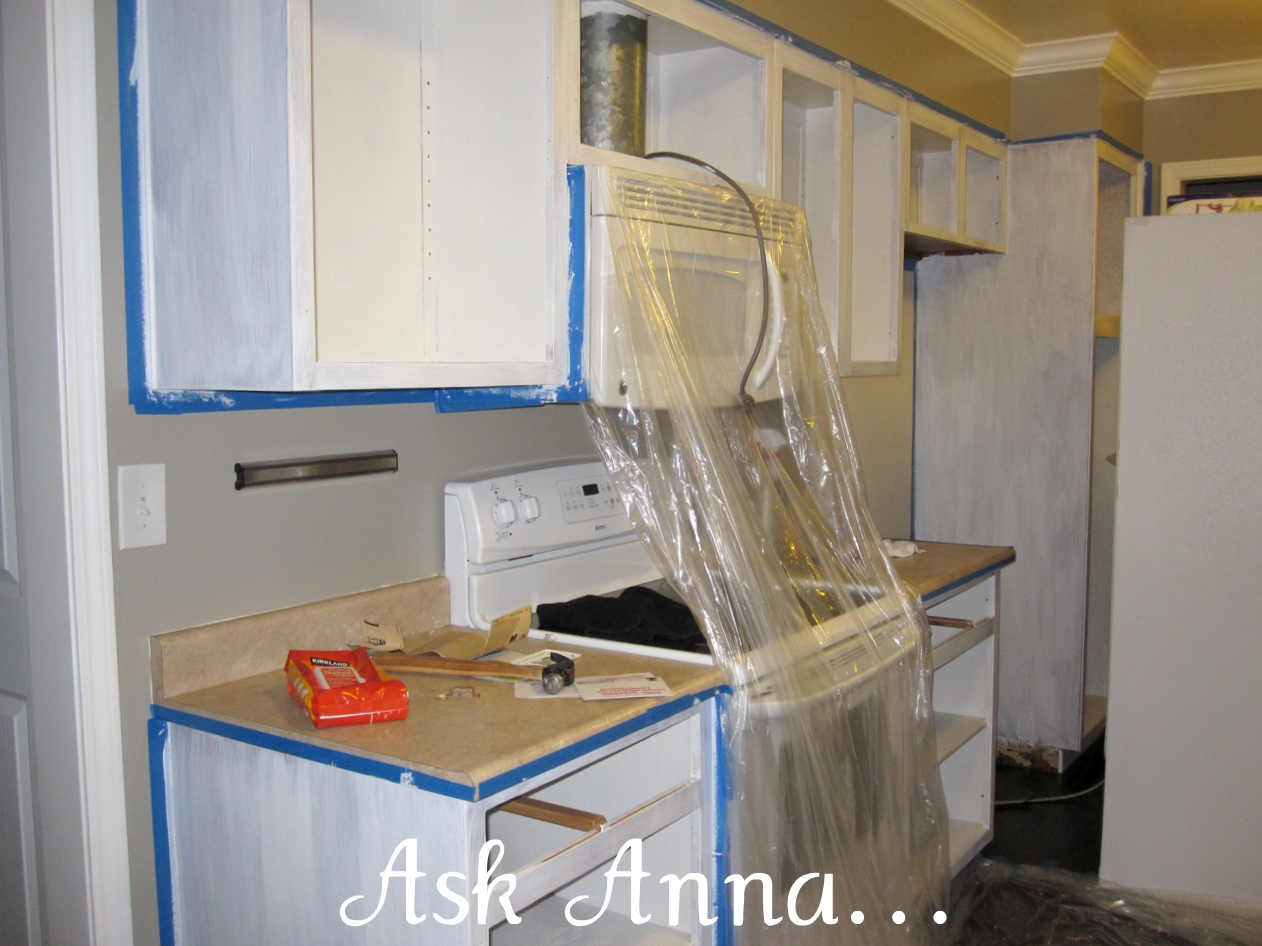
The date was set, my husband took two days off work, we had a babysitter, it was time to begin. Let me tell you that there was nothing “easy” about this project. From the moment we started I was already pep-talking myself telling myself that it would be worth it in the end. We spent 3 solid days prepping, painting, applying hardware and putting the kitchen back together. It was an incredibly long process but the transformation was worth it.
My review of the Rust-Oleum Cabinet Transformation kit is mostly positive. I am extremely happy with the outcome and I feel that the paint is durable and will last for many years to come. Here’s a breakdown of the 3-step process according to Rust-Oleum’s directions:
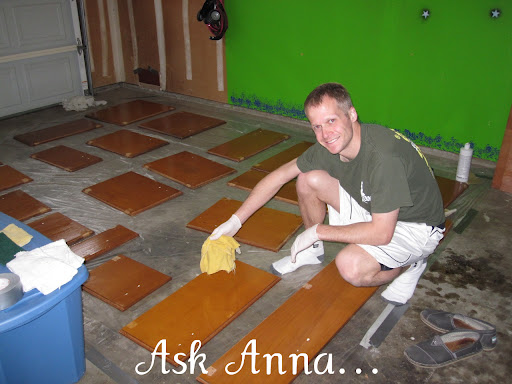
Step 1: De-Gloss. Instead of having you strip and sand all of your cabinets (a horrible process from what I understand), Rust-Oleum’s kit includes a De-glosser that you simply scrub your cabinets down with. My husband did this process (while I was painting the interior of the cabinets) and he said that the de-glosser was similar to soapy water. Our cabinets had years of wax build-up on them so at the end of the de-glossing process I didn’t feel like they were stripped as much as they needed to be but I trusted that the manufacture knew best.
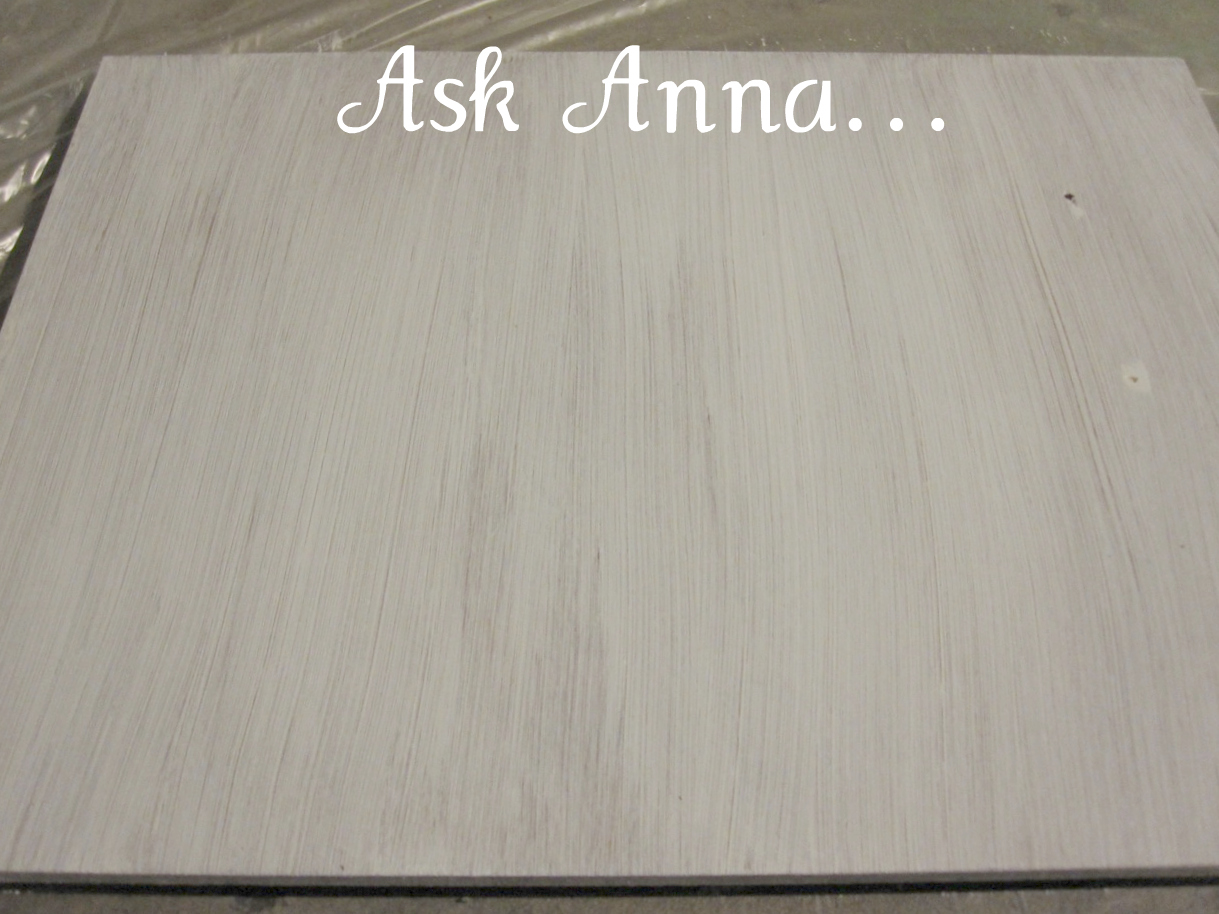
Step 2: Painting the “Bond Coat” (the “bond coat” is the color coat in the Rust-Oleum kit). The bond coat paint is a very thin paint but it is rich in color. We decided to paint 3 coats, even though it says you only need two, because I wanted our cabinets to be a rich, bright white. This meant a lot of painting and a lot of waiting for paint to dry, but again it was worth it in the end. I love the bond coat paint, because unlike normal paint it is really thin so even though we applied 3 layers the cabinets don’t feel thick and caked with paint like you would get with regular paint.
Step 3: Gloss. The last step is applying the gloss, or hard coat. The gloss dries really quickly so it is hard to correct mistakes but I love the way it looks when it has dried. We started out applying too much gloss (the amount we would use if we were painting) but it started bubbling so we quickly corrected our mistake and used less gloss and painted with a slower stroke, this seemed to be the key to getting a perfect gloss coat. “Less is more” as they say. After applying the gloss coat you have to wait 12 hours for it to completely cure, this was hard because by that point I was ready to put the kitchen back together!
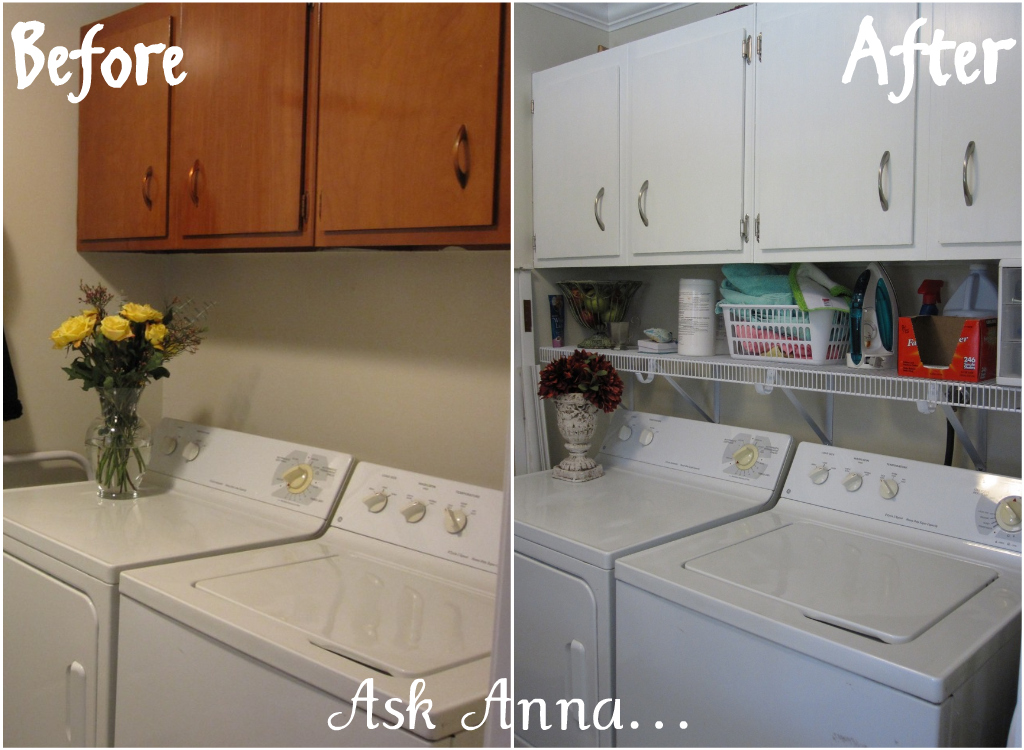
After a long 3 days we were finally rewarded by getting to see our new kitchen put back together and we were thrilled with the results. Overall I would recommend the Rust-Oleum Cabinet Transformation kit. There were a couple of things I was unsure of, like the de-glosser, and needing to apply 3 coats of bond coat instead of just 2, but I think the positives outweight the negatives. I love that for only $149 for a large kitchen/$79 for a small kitchen the kit includes everything you will need, it even comes with a DVD that shows you step-by-step directions. The directions are simple, the process is easy to understand and in the end our cabinets look great and seem incredibly durable. From what I have heard, even though this was a long and tedious process, our experience was much better than those that have refinished their cabinets the traditional way: stripping, sanding, priming and painting.
I’d love to hear your cabinet transformation stories!
NOTE: I was not hired by Rust-Oleum to review their product, I am simply doing this for you, the reader. When I take on a project I want to know everything I can about what my options are so that is why I wrote this review.
Ohhh! I wish I had known about this a about a month ago when I started my kitchen. I did skip the sanding part becasue my cabinets are pretty "dry" but the priming and painting is taking so many coats. I think that product would have given me just a slightly higher gloss look but would have ben easier! Thanks for sharing 🙂
I hope you'll update this in a year or two (or five!) and let us know how it holds up compared to the traditional sanding, priming, etc… It looks great.
Thank you for the awesome review!! I've been doubting these kits but since i trust you.. It totally changed my perception.. I'm ready to really renovate our kitchen.. Thanks to you..But one more thing, which one did you purchase? the bigger kit or the smaller one.. because it seems like we have the same size of kitchen..Thank you again.. =)
I used the Rustoleum Kit also and as you said it's quite time consuming but also very worth it…I did the glazing step also and was stunned at how amazing my cabinets turned out!! Your kitchen looks fantastic!!
@Baby- can you please email me your email address so that I can answer your questions. Thank you! My email is [email protected]
I'm visiting from Remodelaholics party… and I'm SO glad to see this review! I want to paint my cabinets this summer and this looks like the product to use! One thing, I would like to glaze mine to age them a little (in keeping with the age of my house). I noticed 3krazychics mentioned glazing afterward… is the glazing included in the kit or is that separate? Also, like Baby, I'm wondering which size kit you used. I'm going to be a new follower of yours… ~Rachel
It looks great! I mentioned earlier that I too would be redoing my kitchen. I really want to repaint my cabinets because despite being painted only two years ago, they are already chipped. But I figured I would probably leave them alone since as you said it is a big job, but now I think I might just do it! Thanks for writing this! I will definately look into it! And thanks for linking up to my Sew Crafty Saturday Party !
Time consuming, but your cabinets look great! I know you love having your kitchen back and with a beautiful new look – good job! I "followed" you from Tatertots and Jello's linky party, and would love you to "follow" me back atwww.Redo101.blogspot.com
I've seen it at Home Depot and always wondered. Thanks for the review.
I'm so happy to see your review and how wonderful your Kitchen looks. I'm visiting from Support Blog for Moms with Boys. Great job!
Love it!!! I'm fix'n to tackle something like this too! Thanks for linking up to Mad Skills Monday!
Hey Anna! I'm so glad my review and pictures were helpful for you! We are still really happy with the results and they seem to be holding up really well so far. Your cabinets look beautiful!
I love that you reviewed this product. We too have similar cabinets in need of some paint, but the nerves get me everytime!Would love for you to share at Calling All Crafters, today!
gotta love rust-oleum!! we've used it before on various projects. Thanks for linking this up to wicked awesome wed!
Thank you so much for this review and especially the pictures. I've been eyeing this product, thinking of trying it to re-finish a desk to a bright white for my daughter's room.
I loved this product. Changed my cabinets from construction 'wood grain' to Espresso! Yummy! Took a couple of days, but, yeah, it was worth it!
Anna, What about chips in previously [email protected]
Love your kitchen! Has the paint held up on the cabinets and would you still recommend the Rust-oleum paint kit? Also I would love to know the color you used on the walls. Thanks for all the wonderful tips! [email protected]
Hi Anna,
We’re in the process of updating our kitchen and we’re thinking about using this kit. I have read and thoroughly appreciate all that you’ve said….but I’m wondering now that some time has passed, are you still as happy with it? Thanks for your blog, it truly is inspirational!
Sorry I’m just responding to this! Yes, even after about 18 months I would still highly recommend this kit! It’ has held up very well for us and I’m still super happy with the way it looks. 🙂
Is this product durable enough to redo kitchen cupboards and utility cabinets in a rental??? I think the product looks great and I wouldn’t hesitate in my own home but an concerned about doing this in an old rental that I own that needs a pick me up. What do you thinjk????
Absolutely! It’s a great product, I would totally use it in a rental.
Hi Anna, I bought the kit and I am determined to do my large kitchen. I have 10 year old builder’s basic oak cabinets and I would like to change them to white (with no glaze), as you did. My biggest stumbling block is the color. There are 5+ colors of white. Which did you use? I think I’m leaning toward Pure White, but don’t want it to look “fake”. Would linen be a better shade? Thanks for your help.
Liz I did the Pure White color because I wanted mine to be bright white. I thought the linen color was pretty but I think “dingy” white would make me crazy. Good luck! Send me before and after pictures if you have a chance! 🙂
Nice post! I just finished my bathroom cabinets using the espresso color. I wrote up a how-to article with pictures and tips based on what I learned. I definitely am please with the results. http://www.squidoo.com/how-to-paint-cabinets-using-rustoleum-cabinet-transformations
Hi, Anna! I’m super happy to read your post about this as we are getting ready to redo our cabinets as well (and they look almost exactly the same as yours 🙂 My one concern is the appearance of brush strokes? Did you notice any issue with this?? What kind of brushes did you use? Thanks!
I think we used foam rollers on ours, I can’t remember. I think if you do enough coats you won’t notice the brush strokes. We have been happy with the way ours turned out. 🙂
Hi=
I just purchased this kit, and am a little nervous to start after some of the comments I have read….Are still happy with the way the color looks and has there been any peeling? I would love to hear if you’re still happy with the way your cabinets look!
Thanks!
Anna
Yes we are still very happy with the cabinets and how they look! I would do it all over again if I needed to, because I think it’s a great product!
How is the paint project holding up to use? Does it clean up easily and is the finish still like new?
I love it! It cleans up easily and is still in great condition after over 2 years.
I am almost done after 2 months for a large kitchen with this product. Only working on weekends. This is a very time consuming project. I also don’t have the space to paint everything at one time. Going to be around 120 hours from start to finish. I love the deglosser and primer. The Top Gloss is a pain. I am doing thin coats, but keep ending up with a corner or two of my doors and some times in the middle of doors with the top gloss turned yellow when it dries. I don’t know why this happens. Overall, I like the product, but the top gloss needs improvement.
Hi Anna , I am considering redoing my cabinets as well using the rustoleum cabinet stuff , but how strong are the fumes does the stuff smell very bad I only use no Vic paints which basically have no odors
I don’t remember the fumes being too bad but we did all the painting of the doors in our garage. It’s been a few years since we did the project, sorry I don’t have a better recollection.
This looks awesome, Anna!! We are re doing our kitchen next weekend. We always talk about buying this when we go to Lowes. Our plan was just to reprint our white cabinets but this looks like it would be better. Thank you!
This looks awesome, Anna. We are planning on re painting our white kitchen cabinets next weekend. This looks like it would look so much better! All your new house projects look amazing!
Hi there! The transformation looks great! We’re thinking of doing the same thing — going pure white using this rustoleum product. The product claims it’s not for use on the interior of the cabinets. I’m wondering what type of paint you used inside and how it’s held up? I’m nervous to use normal paint as it might chip easily while moving lots of items over it.
Thanks for the helpful tutorial! It makes me feel like I can actually tackle this 🙂
For the inside of the cabinets I used a paint/primer from Olympic (I got it at Lowes). I also added shelf liner when I was done to help keep the paint from chipping. Overall I was super happy with the way it turned out! 🙂
i just bought the kit today and am ready to work, but just have to say out loud how pleased I am to be refinishing my kitchen for $100 instead of having new cabinets installed, or having it refaced! I think 3 days of work are worth a giant savings like that, I just saved 10 grand, right.
Absolutely!! You won’t regret it!
Hello Anna could you please tell me which colour name of white that you used? It seems there are 3 different whites and I am looking for a true, bright white.
Thanks for any help
Leslie
I am currently refinishing our kitchen 1940s kitchen cabinets from a light stain to white. I not only deglossed the cabinets but am also sanding them. After completing five cabinets and reinstalling them, I could see that even though I painted three coats with the best paintbrush available, I had some uneven coverage. Before I paint the rest of the cabinets I will prime them first, and may end up priming over the finished cabinets to get even coverage. Yes you save money doing it yourself however I feel the instructions/kit should include primer.
Could you please let me know the color you used?… Love it and is exactly what I want
We used the plain white color, unglazed.
I wanted to know how you got white for the end result!? I know it comes with stain, so do you not use the stain and go straight to gloss? The you tube video only showed how to stain it. Im trying to figure it all out before buying it. Im trying to obtain a bright white color. Thanks
Yes, it comes with paint and a finishing glaze, we only used the paint and skipped the glaze because I wanted it really white.
Hi
Thank you for your break down of refurbishing your cupboards with rust oleum. Do you have any tips for linoleum floors that are in bad shape but the budget is
very limited?.
Have a great day:)
Kat Pierce
I’ve never refinished linoleum floors but I did have a friend paint them and they turned out amazing! You’d have to go to the paint store to ask them the best kind of paint for that project. 🙂
I’m currently doing my kitchen with the same kit. I’ve completed one section but didn’t do inside the drawer or cabinets. ?
How have your cabinets been wearing so far? I just finished mine the section I started with 3 months ago is turning yellow!!! We painted with the Pure White color and followed the instructions to a T. Have you noticed any yellowing of your cabinets?
Hi Laura! Unfortunately we haven’t lived in that house for over 3 years, so I’m not sure how they are holding up. I do remember a little yellowing on the corners but it wasn’t enough to bother me. Sorry I can’t be more help.
Hello!
How long did you live with those cabinets and how did they hold up?
We lived with them for a couple of years and they held up really well. The cabinets were old (from the 50’s) so they weren’t in great condition to begin with, but the product held up well and made them look so much better!