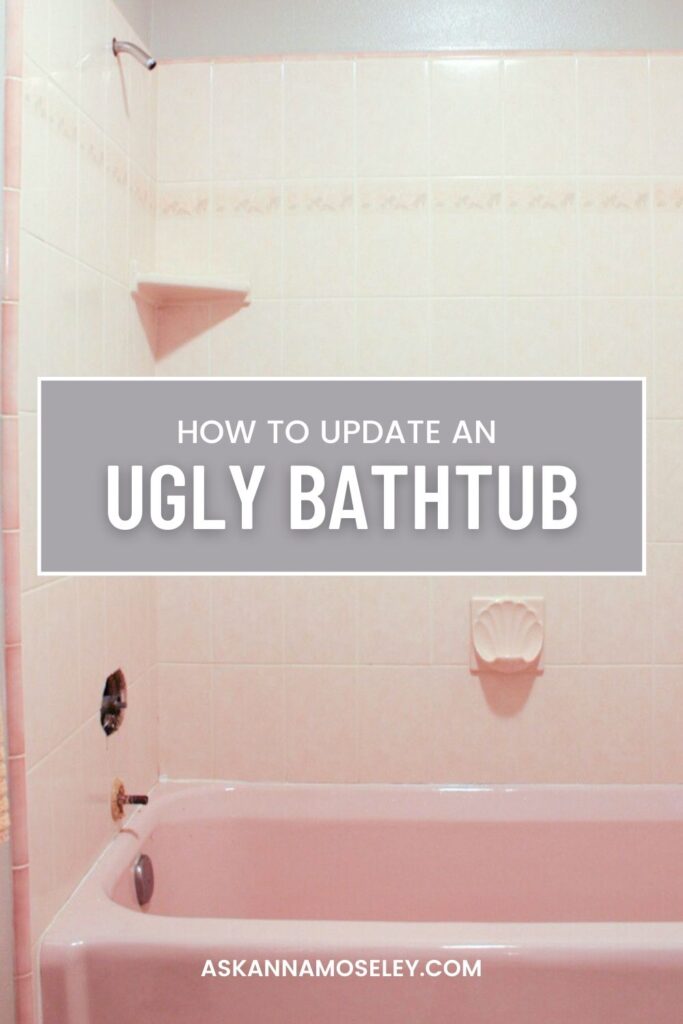
When we moved in our bathtub was pink! See how I update an ugly bathtub and make it fabulous! You won’t believe the before & after pictures!
If you have any questions about how to update an ugly bathtub, or the products used, please CLICK HERE to review the FAQ page.
***To see my video review of how the product is holding up a year later, click HERE.***
I am so excited for this post today! I’ve been waiting for the sun to come out so I could take good “after” pictures to show you just how amazing the transformation of our PINK bathtub is! I’m going to show you how to update an ugly bathtub, or an old tub, for less than $30, yes, that’s right, less than $30!
How to update an ugly bathtub
Materials needed:
- Tub and Tile Transformation by Rust-Oleum
- Bathroom cleaner and sponge
- 180 grit sand paper
- X-acto knife
- Tub caulking (this is what I used to re-caulk)
- Caulking gun
Before I show you the fabulous “after” pictures, let me give you a glimpse of what it looked like before. Warning: these pictures are VERY pink.
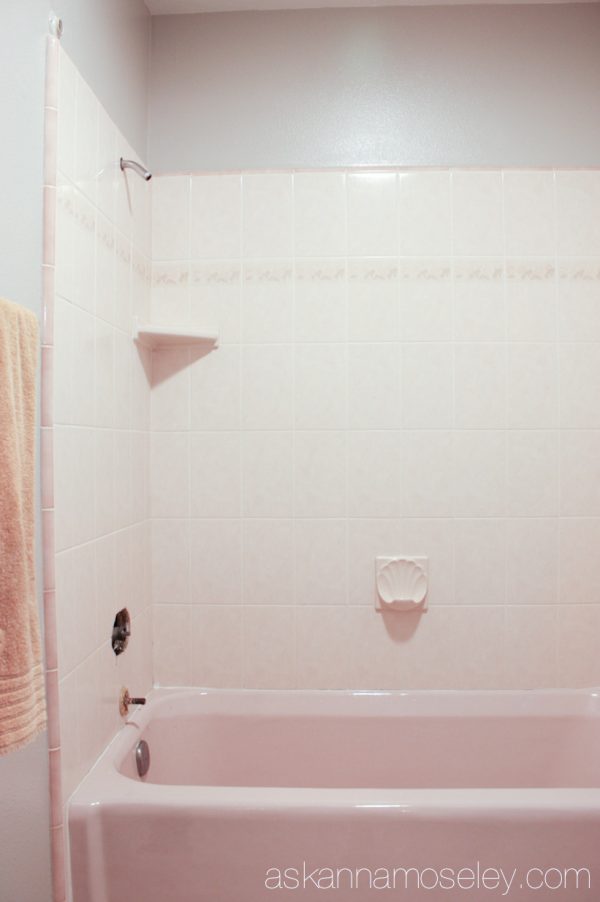
These pictures are for real, I am not making this up. You’ll see how pink the rest of the bathroom was next week on my big Guest Bathroom Reveal post!!!
I knew that replacing the tub and tile was WAY out of our budget, and the thought of another renovation was exhausting, so I started looking around at other options. That’s when I found a product called Tub and Tile Transformation by Rust-Oleum.It’s an easy way of resurfacing the tub, without having to replace the tub!
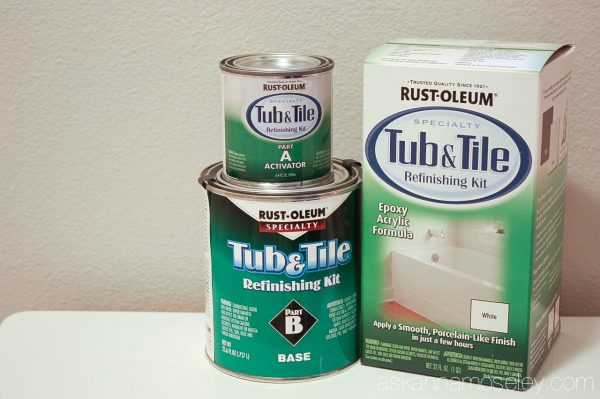
I did some research and figured it was worth giving a try; I mean really, what did I have to lose?
Tutorial:
1. Prep the area:
- Prep the area by cleaning it first. Use something that will be sure to take off any built up grease or grime.
- Remove all the existing caulking with an X-acto knife. If you don’t use a good knife this process could take much longer than it needs to.
- Remove fixtures and hardware
- Sand the entire surface to remove any gloss/shine. The sanding isn’t meant to take off layers of your tile, it’s just meant to scuff up the tile/tub to remove any remaining oils/grease, and to give the product something to adhere to.
The prep took me about 45 minutes but most of the was trying to get the 25+ year caulking off.
2. Next you mix together the two cans of the Refinishing Kit. My only warning is that it smells terrible! Make sure you are wearing a mask and have the fan on in the room. I opened the window in our bathroom too, even though it was pouring rain.
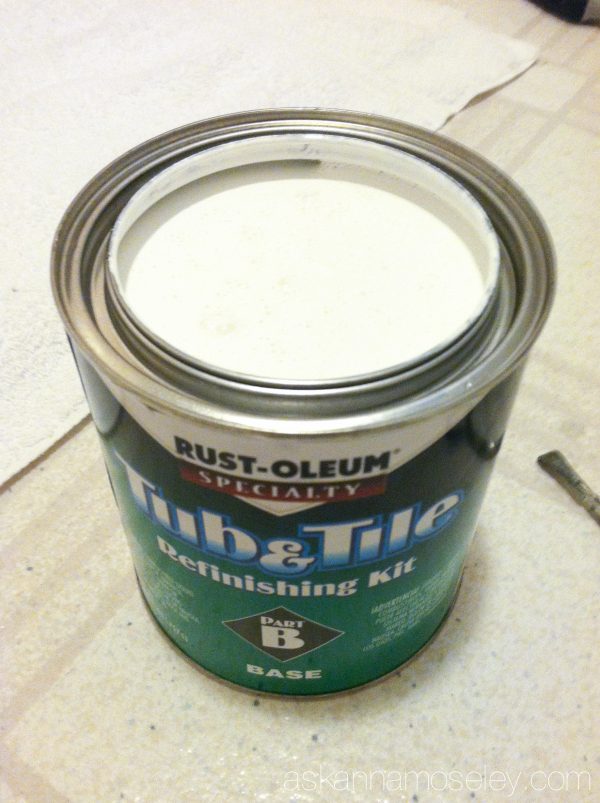
When I put my first stripe of paint on the tile I got really excited. See you NEVER again pink tub and tile, hello pretty new finish!
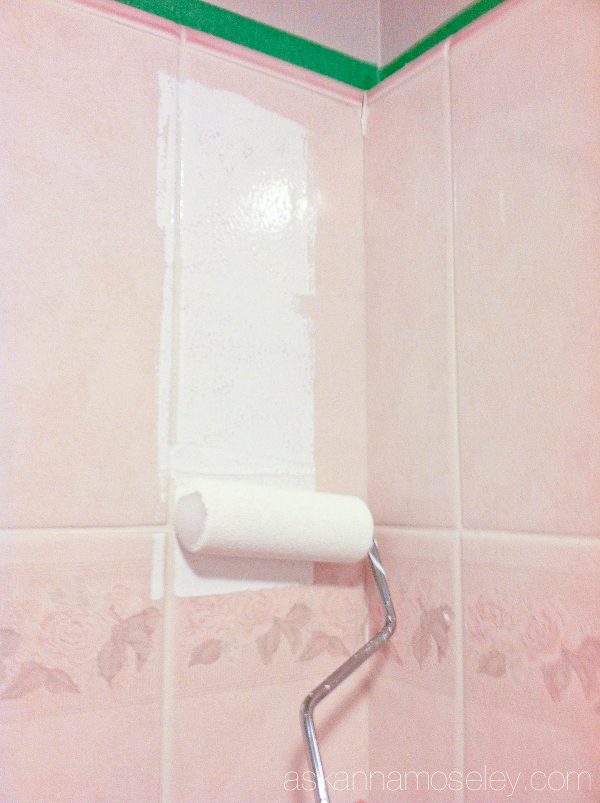
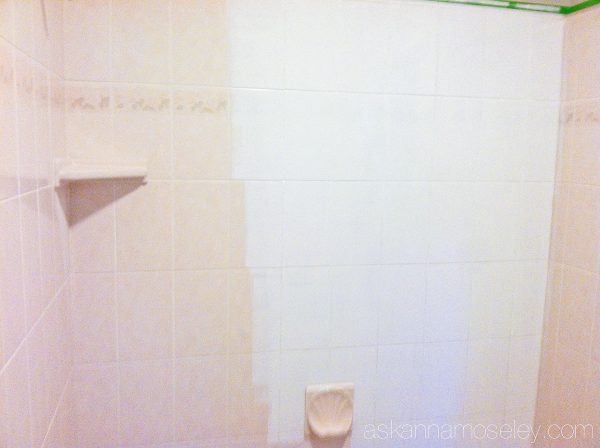
I painted all the walls first so I could stand in the tub, here’s what it looked like after my first coat on the walls.
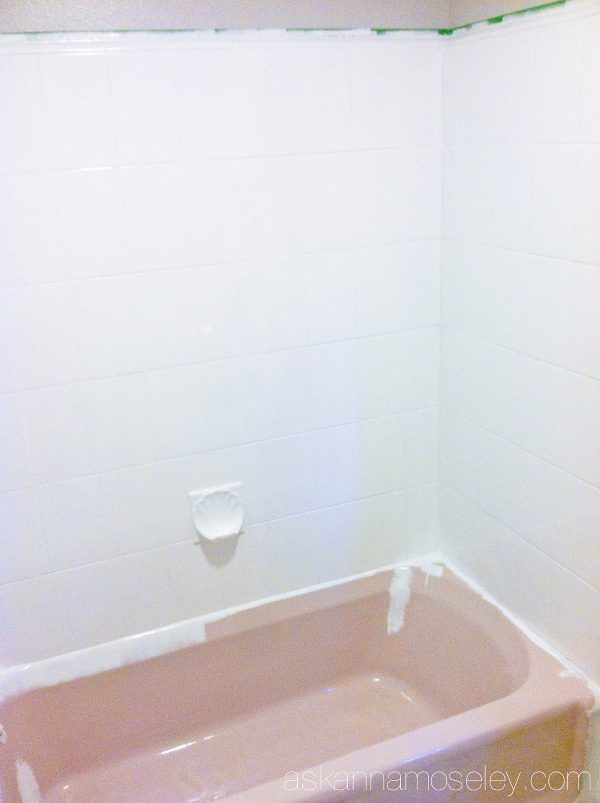
Isn’t it crazy how much brighter it looked after just having painted the walls!? Here’s what it looked like after the first coat on almost the entire thing. It’s like a new tub!
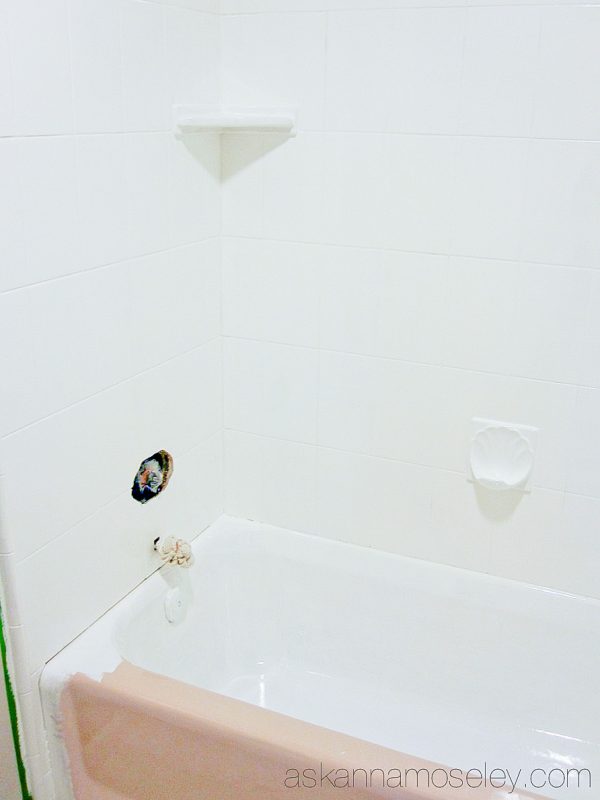
Bye-bye last little bit of pink! (Can you tell I couldn’t wait to get rid of the pink!?)
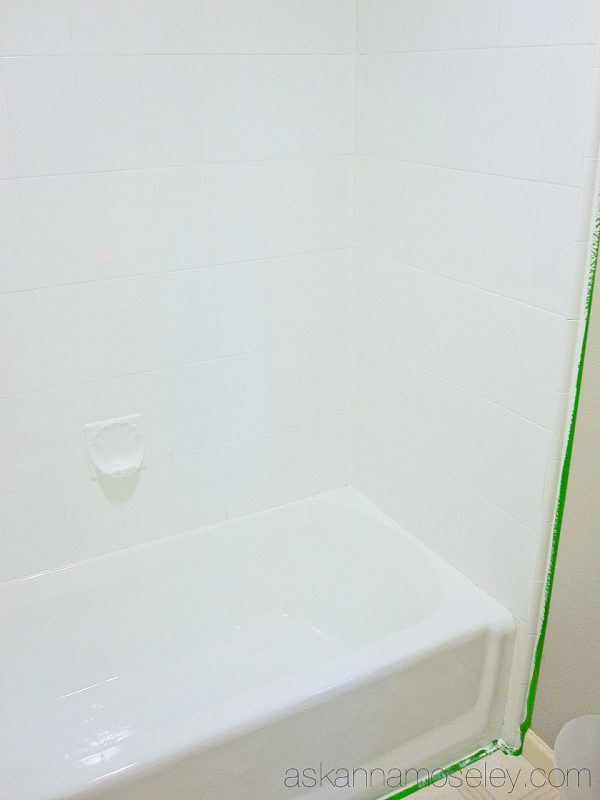
3. After the 1st coat I let it sit for an hour and then came back to paint the second coat. Then I let it sit over night to dry. The next day I peeled of all the FrogTape and I swear I heard angels singing!
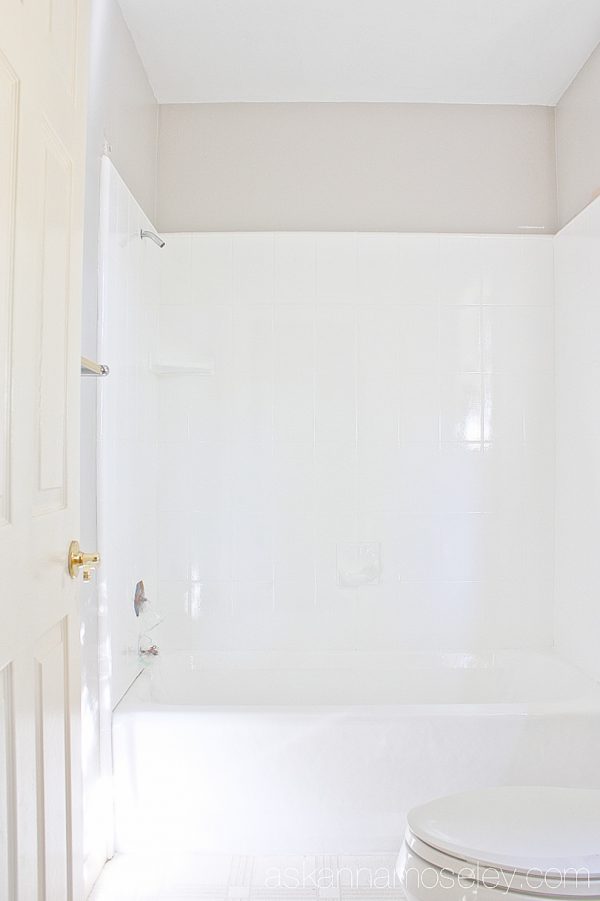
Isn’t it AMAZING!?! I seriously couldn’t believe how much better it looked! Let me just remind you of how far we came in just 1 day, and only a couple hours of work.
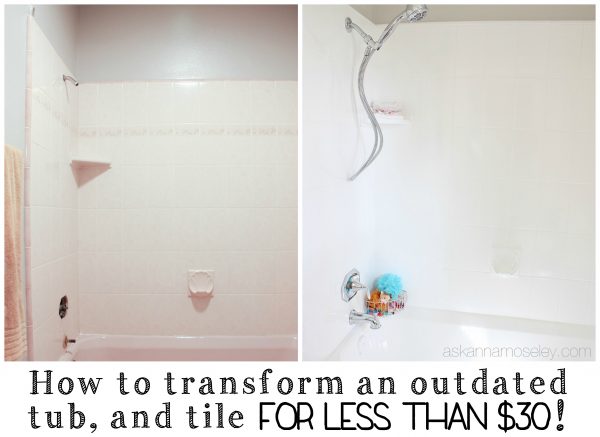
After re-caulking the tub (click HERE to see how to do it like a pro) we added a new shower head and tub filler and I couldn’t be more thrilled with how it looks now!
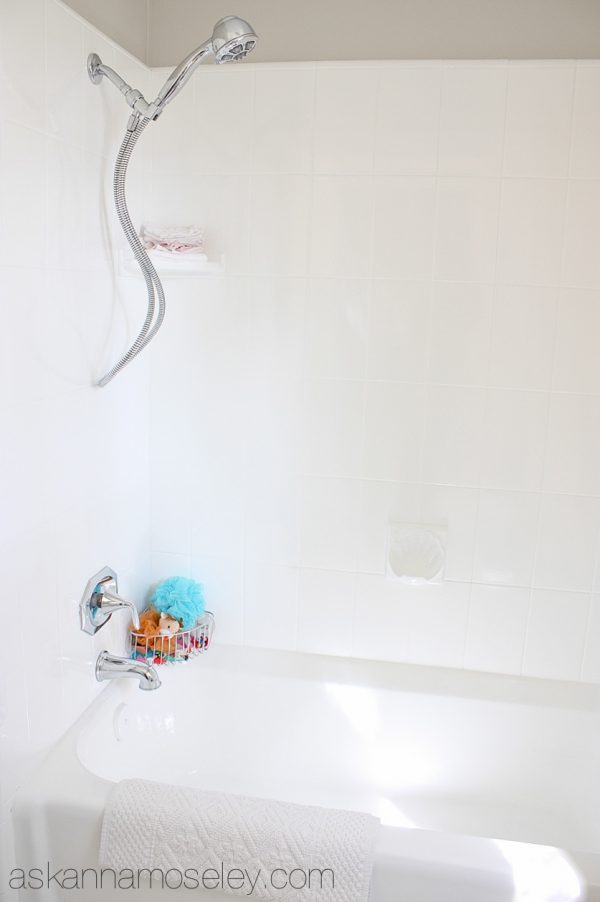
Isn’t it amazing how much brighter the room is now!? What a difference this easy makeover made in our bathroom! THANK YOU Rust-Oleum Tub and Tile Transformation!!!
Here’s a little video which shows the before and after, talks about the durability and how it’s holding up after a month of use and cleaning!
I have received questions about using this product in other areas, like the bathroom floor. I would not recommend using this on a floor, because it is a shiny product, made to look like tile, so on the floor it might be slippery. I also would not recommend using this product on a fiberglass shower, toilets, or to cover mold, or mildew. Please use this product only as instructed by the manufacturer.

***To see my video review of how the product is holding up a year later, click HERE.***
Did you know this is one of my most popular posts!? To see more of the posts people love click on the titles below:
- How to Paint a Perfect Line – Click HERE for the video tutorial
- How to Stain Brick to Update it’s Look
- The Fastest way to Stain a Wood Fence (or anything really)
- An Easy Solution for Storing Foil and Plastic Wrap
- The BEST Moscow Mule
For your convenience this post contains some affiliate links. Click here to read my full disclosure policy.
Looks amazing! Great job 😀
Your shower/tub looks great, and I’m so excited to try this! We have tile and a ceramic tub that has a lot of rust around the drain area. Do you know if this product covers rust or if we’d need to buy some other product to repair the rust first, and then wonder if the product you used will work on top of it? Thank you for sharing!
I would email Rust-Oleum and ask them about the rust issue. I would guess that you’d need to treat that first, maybe sand it off, but once you got rid of it you could definitely cover it with this product. 🙂
Thanks so much for this! I have a pink bathroom that need some some serious tlc. Could u tell me how this holds up against water and wear . Thanks again
It has held up really well and I’ve been really happy with it. If you want to see my follow up post, click here – https://askannamoseley.com/2015/02/rust-oleum-tub-and-tile-refinishing-kit-a-year-later/
Hi Anna, I was wondering if I used this product to cover tile that’s just on the walls in the bathroom, could I then paint over it with regular paint? Or any other ideas to cover tile?
Thanks!
I definitely wouldn’t paint over this product. It’s very glossy and I don’t think paint would adhere to it. If you just want to pain the tile, I’d recommend a really good primer, then just paint right over that. 🙂
April 19; 2022 i have been searching for the tub n tile for months. NO ONE has it. Where can i get this? I need to paint my yellow tiled bathroom and floor.
I’m sorry, I’ve always found it on Amazon but looks like they’re out of it right now. Years ago I saw it at Lowe’s or Home Depot (can’t remember which one) so maybe try checking your local stores. I wouldn’t recommend painting the floor though, it is meant to mimic the smooth, glossy surface of a tub, so in my opinion, it would be too slippery for a floor. 😉 Good luck finding it!!!
I did see Amazon sells this brand (https://amzn.to/3JXhIhu), which has good reviews, so maybe give it a try. If you do, please let me know how it goes so I can let my readers know there is an alternative brand that is also good. 🙂 Thank you!
I had rust around the drain in my kitchen sink that I’d tried bleaching out (didn’t work) as well as Ajax (also didn’t work). Then I saw a tip on Pinterest that that actually worked. I poured Lysol toilet bowl cleaner (the gel type that doesn’t run real fast) over the rust and let sit for 30 min (because I went to do email, lol). Came back and briefly rubbed my dish brush over it and rinsed… no more rust!
Awesome! Thanks for the great tip! 🙂
It looks great! I’m a huge fan of this product. I used it on a shower pan in a home I was selling. The stains were there when I moved into the house, and I’d tried everything to remove them. I didn’t want to pay hundreds of $$ to have a professional refinish it.
What I was most impressed with was the texture when it was dry. And the coverage. It didn’t look like I’d PAINTED my shower. I wouldn’t hesitate to use it again for a project like your very pink tub!
You are wise to recommend wearing a mask…and probably a filtered mask is best. Not only does this product have noxious fumes, I found that exposure to it did some temporary damage to my taste buds. I couldn’t taste anything for several weeks. Eye protection is probably a good idea too. 🙂
Amazing!!! I am inspired. What if there are dark spots in your grout, will it cover and seal that as well? I didn’t see a single dark spot in your before photos. Thanks!
When you clean/sand during the prep those will probably disappear. We had some mold spots but I got rid of them during the cleaning process. 🙂
Can I ask how much did you sand? Did the glaze feel rough or was it mainly to just get the dirt off? I would love some more information on what you used as well!
First I cleaned it really well to strip off any grime, then I sanded just enough to take the shine off. There were a few areas that I could tell I didn’t sand enough but by that time it was too late. I’d say more sanding is better – better safe than sorry. 🙂
Another tip is baking soda and vinegar mix to a non runny texture, use a battery powered toothbrush for grout and corners, a nylon brush for the tile. Let sit for at least 4 hours. Wash off with a nylon scrubber and water. I learned this from Rehab Addict on HGTV.
Great idea, thank you for sharing!
Oh my goodness. I have 70’s tile in my bathroom a funky dark yellow. I wanted to hire a tile glazer to come in and do it. 6 years later still not done. So i will try the refinishing kit. Hey for $30.00 you can’t go wrong.
Seriously! That’s what I said. 🙂
Hi Anna! Than you so much for sharing this. We have a beige/light brown tub and tile surroundin our master and I had been content to live with it cause re-tiling didn’t sound fun but this, this I can do. Your tub looks great! I can’t wait to try this now. 🙂
Talk about perfect timing, I was just cleaning son’s bathroom yesterday and saying I wish we could afford a new bathtub and surround wall as his tub always looks dingy even after cleaning. I am definitely going to do this! Thank You, Thank You Thank You!
Awesome! I’d love to see the before and after. 🙂
WOW -that’s an amazing transformation!! You will have to let us know how it holds up – We are currently looking for a new home and a couple of them had pink./blue tubs – it’s nice to know I have a cheap alternative to ripping them out! So glad I found this post!!
I’m amazed!! It looks like a brand new tub! I’m going to have to try this in my daughter’s bathroom. Amazing!!
I wonder if it will work on sinks? .. I have the most horrendous salmon/pink color in our sinks and jet tub… a nice crisp white would work wonders in that bathroom… Thanks!
Yep, absolutely! Your sinks are porcelain like my tub and it worked great on the tub! Just make sure you give it a good sanding/scuff up first. 🙂
We have a mobile home with the usual crappy (no pun intended) bathroom. Would this work on the tub in our home?
It would work on any tile, ceramic or fiberglass tub/tile.
Hi Anna~
I love your tub & shower surround! It turned out so nicely! Great job.
I have 2 questions:
What about the stuff in the box? You said you mix the 2 cans together but didn’t mention the box.
Also, can you use this product on a fiberglass tub & surround?
We did a complete bathroom gut in one of our former houses. Everything was yellow, including the tub, toilet and sinks. The was-white-at-some-point tile was in bad shape and so we went with a new surround. Did it ourselves, and saved a ton o’ cash.
Juju
The cans come in the box so that’s all there is, just the cans. 🙂 Yes you can totally use this on fiberglass, just make sure you give it a good sanding/scuff up, as per the directions.
hi anna great job looks wonderful…. will it work om a plastic shower stall? ugly ugly shower stall please be gone thanks xx
Absolutely! It would work great on fiberglass, just make sure you give it a good sanding/scuff up first. 🙂
Did you just paint over the grout between the tiles on the wall?
Yes I even painted over the grout lines so that I wouldn’t have to worry about cleaning the grout anymore. 🙂
Your tub looks great! Thank you for posting!!! I have an ugly tub that I would like to try this project on. My tub has a few small cracks, though do you know if this would be ok to use?
I would repair the cracks first and then yes you could totally do this!
Hi. I’m wondering how this has held up now many years later? I’d love to redo my tub/surround and also the tile floor!
We don’t live in that house anymore but when we moved out it had been 3 years since I did the makeover and it was holding up nicely. You can see my post about how it was holding up after a year, here – https://askannamoseley.com/2015/02/rust-oleum-tub-and-tile-refinishing-kit-a-year-later/. I hadn’t seen much change after 2 additional years. I wouldn’t recommend this product for a tile floor because it has a glossy finish and I think it would be too slippery for a floor.
Hi Anna, I have two questions. How and with what did you sand/scuffed up? You used the roller for walls, but what tool did you use for the bath tub? Because I imagine would be hard to smoothly cover the bathtub rounded corner pockets inside of the bathtub with the roller.
Sandra,
This is Monique, Anna’s assistant. She used sandpaper to scuff up the bathtub surface. You are really just looking for a rough surface that the paint can adhere to. Anna used a sponge to clean the tub and she said that a foam roller is sufficient enough to paint the tub. The paint is actually self leveling so that will help to smooth things out. Hope this is helpful. Please let us know if you have any questions!
Hi Anna, Your tub makeover looks great but I have one concern. You did not show the area around the tub drain. Do you just mask that with tape. Or what do you recommend? Thanks. Lee
It was an ugly brass drain so I just painted it along with everything else. 🙂
we paid some one to paint are shower and walls spray painted the tub the tub has all these little bumps on it and also the paint on the bottom of the tub has bubbles water is getting under
the paint and in a couple of places the paint has come though if i buy this kit rust-oleum tub tub and tile refinishing kit do i have to remove all the paint that has been put on or just clean it as you did in the video.if i knew of this kit we would have done this are self no one at any of the hardware stores did not suggested this product please please advice .
thank you hope to hear from you soon
linda smith e-mail address zoey1390@gmail .com
Linda,
This is Monique, Anna’s assistant. She suggests that you do remove all the paint that has been put on because is you do not get the old paint off you will have the same problem if you do the Rustoleum Kit. She recommends that you sand off the the old paint so that you are starting on a smooth surface. Hope this is helpful and let us know if you have any other questions!
Genius!! Love love love this idea!
I was hopping you’ve cleaned the tub since refinishing and could recommend cleaning techniques/products.
I refinished my tub in July and have since been on a blog search for cleaning techniques. I’ve even written Rustoleum, but have yet to hear back.
Any suggestions are welcomed!
Hey Ashley,
This is Monique, Anna’s assistant. Anna has found that this kit to be very durable. She uses a Scotch Brite scrubber and has had no scratching and peeling. Hope this is helpful!
Hi Anna,
I came across your website and I love it!! Especially because I have the same pink bathtub issue…
I was wondering what did you do with drain? Did you just paint over it?
I just painted the drain. 🙂 It was easier, and cheaper, than replacing it.
Pleeeeease email me and tell me where you got your shower curtain! I need it. lol. And thanks for the tutorial. I’m so doing this in my RV!
It’s a set of drapes from Target. 🙂
Hello Anna.
I am not sure how long ago this post was made, but I am curious if the Rustolium Tub and Tile paint lasted. We have recently purchased a home that was built in 1950 and has a beautiful Blue bathtub (walls, ceiling, sink and toilet!) I really don’t want to rip out the tub as is a cast iron tub and in great condition. I am hoping that this would be a quick fix to an ugly bathroom. Please let me know how it has lasted and if you have had to do any touch ups.
Thank you for your question, people ask me this all the time and once the weather gets nice here (for good lighting) I want to do a follow up vlog about the product. For now, I’ll answer you here though. 🙂 I have been incredibly happy with the product and would totally use it again. I have recommended it to lots of my “real life” friends and they have all been happy with it too. It’s a totally durable product and has held up great, with no scratches, nics, peeling, etc. I absolutely give it my approval. 🙂 Hope that helps!
Did you just use one box to cover the tub and walls twice or did you need to use two boxes to finish this?
I finished 90% of it with one box. I probably could have stretched it but I had 2 so after I finished I did an extra coat with the 2nd one.
So, is it ok to do a 3rd coat ???? Or did you just do 2 coats.
You could do 3 if you have enough product left over. I just did 2 coats though. 🙂
Anna,
Does the Rust-Oleum Tub and Tile Transformation come in other colors or just white?
I can’t wait to try this product.
I’ve only seen it in white. You will LOVE the product, it has held up fantastically! I’m going to be doing a follow-up video soon. 🙂
They have 2 other neutral colors; Almond and biscuit.
Hi, I love the makeover! Do you use the shower daily? We are doing a bathroom makeover and want to do the tub….is it durable or do we have a pro come in? Any peeling in corners or anything?
Hi Steph! I’m going to be doing a video update on this soon because I’ve had so many people ask me the same questions. 🙂 We do not use the shower daily, it’s mostly just the tub that we use for my daughter’s baths, which are e/o day for the most part. We haven’t experienced any peeling, I have found the product to be SUPER durable. And trust me I’ve put it to the test, scrubbing it clean when it gets dirty. 🙂 I have also recommended it to a few friends, both of which have also been very pleased with the results. I would say use this product over calling a pro because it will save you TONS of money and you’ll love the results. 🙂 Hope that helps!
Will it work on a tub surround?
Yep, I painted our tub surround too. Everything was pink and I painted it all white!
Do you use a mat in the bottom of the tub since you have painted it.
I never did because we mostly used it for my daughter, for baths. The texture was the same as the finish on a normal tub, not any more slippery.
This transformation is beautiful! I’ve heard about this Rustoleum Kit before and now I can’t wait to try it. I haven’t seen this asked yet so I had to comment. When I clean my bathtub, I like to use Comet and one of those green scouring pads, and I really scrub to make sure all the soap scum and such disappears. After all this is long finished and dried, when cleaning time comes, does this stand up to a good scrubbing?
I’m sure it would stand up to the test but you really don’t need to use something as harsh as comet to get rid of soap scum. You should check out my post for today, I’m sharing my favorite cleaning products and I love my bathroom cleaner, it’s awesome and smells good too. 🙂 https://askannamoseley.com/2015/02/my-favorite-cleaning-products/
I live In a mobile home, will this work on my tub? Not sure what its made of. Looks plastic.
It’s probably fiberglass and yes it would work. Just make sure that you clean it well and sand it down before using the product.
Did you use a foam roller? Do you have to remove the old caulk? Thanks!!! Great post. I found some at the habitat re-store for $15.
That’s cool! Yes, I used a small foam roller to paint the tile and tub. It’s important to remove any/all old caulking because otherwise the product won’t adhere properly. I just recaulked when I was done painting and it had dried.
Hi Anna, this looks amazing. on the topic of smell (weird start to a sentence I know), how bad was it and how long did it linger? I want to paint our bathroom but I’m afraid I won’t be able to live in my home until the smell disappears. Thanks so much!
It was pretty bad while I was doing it but I kept the door closed and the window open and it was a lot better by the next day. The rest of the house didn’t smell though. 🙂
So I finished my tub and it looks awesome. Only after did I finish did I read that you need to wait 3 days before letting water touch the surface. Did you wait that long? It’s my ou bathroom and I’d love to be able to shower haha.
I don’t remember how long I waited but I know it wasn’t 3 days!
I am confused. Above you said that you just painted over the caulking so you wouldn’t have to clean it anymore. Now you state that you removed the old caulk and then re-caulked over the new paint?
I painted over the grout but I removed all the old caulking then re-caulked when I was finished.
How does this stand up to normal usage/wear and tear? My bf thinks it would have to be redone frequently.
Hey Stacey,
This Monique, Anna’s assistant. She has written a follow up post about how her tub is holding up a year later. You can find that post here: https://askannamoseley.com/2015/02/rust-oleum-tub-and-tile-refinishing-kit-a-year-later/
Hope this helps!
My kitchen walls floor to ceiling are an ugly pink marble tile. Will the tub finishing kit also work to paint the kitchen ceramic tile walls?
The tile in our bathtub had a shiny/gloss finish, so I would imagine the product would work the same on tile, however I would probably email Rust-O-Leum and ask them, just to double check. 🙂
How many kits did you use? Did that one box do your wall and tub?
I think I could have done it with just one but I had 2 kits so I was liberal with the paint and ended up using about 1 1/4 kits.
Hi, Anna! I’m getting ready to tackle this project this weekend. One question; what type of roller did you use? I read on Amazon that the paint will cause foam rollers to decompose and leave little bits of foam in your paint job, so what do you recommend instead, or did you not have that problem? Thank you! So excited to cover up my ugly tub/shower!
I used a small foam roller but I bought a pack of them and switched them out when I noticed it start to decompose. I think I only ended up using a few of them, it wasn’t too bad.
Hi!
I was wondering how your bath painting project has held up..? Looking at attempting this in our new house over a gold tub. 🙂
Hi, Amanda! I’m Anna’s Assistant, Bethany. Anna created a follow-up post to show just how well the bath painting project has held up after one year of use! Here is the link:
I am interested in seeing that link that you sent on the bath tub/tile redo a year later…it did not show up on your last reply post. I am really considering redoing my shower using the same product after seeing your initial post. Thanks!
Hello, I’m Anna’s assistant, Bethany. Here is the link, but please do let me know if doesn’t show up for you, and we’ll try another way. Thanks! https://askannamoseley.com/2015/02/rust-oleum-tub-and-tile-refinishing-kit-a-year-later/
I used this on mine and a year later it peeled (figured I missed a spot sanding) re-did it this year and the product never set… It’s a bandaid- not a permanent solution. I’m very disappointed in it.
Bummer! I’m so sorry to hear that. 🙁
This looks great! Curious – how is it after a year of use and cleaning? Has it held up in the tub?
Here’s my full video tutorial for how it’s holding up – https://askannamoseley.com/2015/02/rust-oleum-tub-and-tile-refinishing-kit-a-year-later/
Hi Anna, thanks so much for this post, I’m crazy inspired to get to work on our bathroom now! Still trying to decide whether we fix it up or buy all new everything.
I would really like to know how this is holding up now more than a year down the line?
Thanks!
Oh no, I’m one of thooose people, haha…sorry! I didn’t see the link, I always ignore text in a different colour expecting it to be ads.
Question answered 🙂
Haha, no worries. 🙂
So now it has been well over a year. Still holding up? Also, is this bathroom your primary bathroom, does it get daily use? I have only one bathroom, and am wondering if the Rustoleum can hold up under heavy use?
Hello, Terri. I’m Anna’s assistant, Bethany. This bathroom is their guest bathroom and the bathroom their daughter uses, so it is used at least every other day and has held up very well. Here is a follow-up post Anna did one year later, along with a video to show you how well it has held up:https://askannamoseley.com/2015/02/rust-oleum-tub-and-tile-refinishing-kit-a-year-later/ I hope this helps you with your decision!
After painting our yellow surround and tub can I use bar keepers friend (or any other cleaning product) on it? I’d love to try this!
Hi, Andrea. I’m Anna’s assistant, Bethany. The box states that it has excellent wear and abrasion resistance so it should hold up, but it is a painted surface so it is a good idea to not use a cleaner that is too harsh. Anna has some great cleaners that she recommends here: https://askannamoseley.com/2015/02/my-favorite-cleaning-products/
Does this product work on fiberglass tub &wall style tubs
Yes, it does. Just follow the directions on the box carefully. 🙂
Hi!
It’s now a couple of years since you’ve done your tub. I’m curious-Is it still holding up? Does this product come with any kind of Guarantee? I have a modern acrylic tub, that lost its shine when the wrong cleaning product was sprayed on it. Will this fix my problem? Is this product available n Canada? Thanks!
Hi, Wendy. I’m Anna’s assistant, Bethany. Anna did a great follow-up post one year after using the Rust-Oleum product, along with a video to show you how well it has held up, here: https://askannamoseley.com/2015/02/rust-oleum-tub-and-tile-refinishing-kit-a-year-later/
It appears you may be able to order this through a few retailers in Canada. Rust-Oleum ensures that it will have the look and feel of porcelain, but you may want to contact the manufacturer to see if there is a guarantee and if it the Rustoleum Tub & Tile Refinishing Kit will take care of the issue with the lost shine in your acrylic tub: http://www.rustoleum.com/Rustoleum/pages/help-and-support
I have a question about if this is continuing to hold up on the bottom of your tub. We bought an older house and I wonder if this is what the previous homeowners did in our bathroom, however within a year the bottom of our tub started to peel up. It could’ve been our fault from putting little rubber suction non-slip ducks on the bottom each time we bathed the baby but I’m trying to find a way to fix it and this method appeals to me, but I wanted to just make sure before we got started. Thank you!
Hi, Suzanne. This is Anna’s assistant, Bethany. Anna wrote a follow-up post a year later and it has held up well with frequent use (including bathing her daughter every other day!) Here is the link, which includes a video to show you how well it has held up:https://askannamoseley.com/2015/02/rust-oleum-tub-and-tile-refinishing-kit-a-year-later/ Hope this helps!
Will it work on tile floors?
It has a gloss finish so I wouldn’t put it on the floor, it would be slippery.
how has this held up? A previous tenant (or our landlord) tried redoing the tub in our place and the finish flaked. My hope is that this prods will stand up over time. Thanks!
Hi, Malia. I’m Anna’s assistant, Bethany. The finish has held up very well for Anna. Anna wrote follow-up post a year later, including a video to show you how well it has held up: https://askannamoseley.com/2015/02/rust-oleum-tub-and-tile-refinishing-kit-a-year-later/ Hope this helps!
Hi Anna,
The bathroom looks fabulous. You achieved great results so easily. I just wondered “12 months down the line” if the finish is still as good as when you first completed the project? I will certainly do some research on the product, as I have a couple of projects in mind. Do you happen to know if other colours are available.
Thank you for sharing your findings, Alan B.
Hello, Alan. I’m Anna’s assistant, Bethany. Anna actually did a follow-up post one year later, along with a video, to show you just how well it has held up! https://askannamoseley.com/2015/02/rust-oleum-tub-and-tile-refinishing-kit-a-year-later/ Also, I believe they have 3 colors: almond, biscuit, and white. Anna provided a link where you can see the product and it will show you what each of those colors looks like. Hope this helps!
May I ask where you buy this at? I’ve searched several websites and can only seem to find the porcelain finish. I can’t find the A and B cans. Thanks!
Hi, Loretta! I’m Anna’s assistant, Bethany. I just replied to your email and then saw this! I sent you a link directly to the product. Hope it helps!
hi Anna, love your enthusiasm and want to ask you if the results were very slippery. Someone mentioned to me they put silica sand on the bottom to alleviate that.
It’s no more slippery than a normal porcelain tub.
I leave in a 85 years old house now the bathtub is old have green and smoke pink tiles all over the bathroom. I want to decorate paint whatever left over wall silver, but this tiles are insane and i dont like white bathrooms. Any ideas.
This paint only comes in white so if you don’t like white tubs I don’t think this is the product for you. You could contact a professional painter and have them paint it whatever color you’d like but it would cost a lot more.
I am curious to know how this holds up over time with daily use from multiple people? I have seen other products not hold up and start to peel off. This especially is true if the surface is cleaned frequently. Any information on this would be greatly appreciated.
Hi, Linda. I’m Anna’s assistant, Bethany. Anna has written a follow-up post one year after this (which I will link below) to show you how well it has held up. Only one person in the home uses this shower on a daily basis so we can’t say how well it would hold up with daily use from multiple people, but it’s nearly 1.5 years later and it has still held up nicely with frequent cleaning/scrubbing and daily use by one person. Here is the follow-up link: https://askannamoseley.com/2015/02/rust-oleum-tub-and-tile-refinishing-kit-a-year-later/ Hope this helps!
Looks amazing! How would I get old paint from tub up? Had done 5 yrs ago professionally & is peeling….I now have a half white half blue tub!! Help!!!
Yikes! I honestly don’t know, I would call and ask the company that did it, maybe they’ll have a tip. :/
can you tell me if just one kit did the tile and the tub? By the way it looks great!
It took about 1 1/2 kits to do my tub but I did about 2 1/2 coats to make sure I covered every little spot.
I am just curious how this has held up?! And could it be used on the floor of the bathroom? Good work!
Hello, Kristin. I’m Anna’s assistant, Bethany. This bathroom is used daily by one person, along with the occasional guest, and it has held up very well over the last 1.5 years. Here is a follow-up post Anna did one year later, along with a video to show you how well it has held up: https://askannamoseley.com/2015/02/rust-oleum-tub-and-tile-refinishing-kit-a-year-later/
As for the flooring, I wouldn’t recommend putting it on the floor because it has a slippery texture, like shower tile. Anna said she personally thinks it would be too slippery for the floor. I hope this helps!
Hi Anna! I just found your blog and have been wanting to update our bathrooms! We have a powder blue bathtub and tile that someone that lived here prior to us had painted over with just plain old wall paint! Crazy I know! Will this stuff work over the paint that’s already there? Thank you!
Oh man, that’s a huge bummer that they did that! I would strip all the wall paint before applying the Tub and Tile paint because otherwise it will cause peeling from underneath and it won’t give you as good of results. You can use paint stripper or sand it all off, either way is kind of a pain, sorry. 🙁
I saw that you closed the bathroom door and left the window open in the bathroom to get rid of the smell.
I don’t have a window in my bathroom but also don’t want the smell to reach the rest of the home. Would you recommend I just turn on the vent fan with the door closed or keep the door open plus the fan on?
Hi, I’m Anna’s assistant, Bethany. Anna does not recommend opening the bathroom door because it will cause the entire house to stink. You will want to wear a mask, and burn a good smelling candle to help with the smell, and keep the fan on for a few days to make sure it eliminates some of the fumes. Be sure to check your candle every few hours to be safe! Hope this helps!
Thank you Bethany!!
i just bought this product. How do you recommend cleaning the tub before application? Also, did you only use one kit to paint the wall and the tub? We have the outdated tile all along our bathroom walls so I am considering getting another kit, but wanted to make sure the kit would cover the tub and wall area before I start. It looks great thank you!
Hi, Laura! I’m Anna’s assistant, Bethany. Anna just used her standard cleaning product and scrubbed everything really well. Next, you’ll want to sand it down to create a rough surface for the paint to adhere to. On her tub, Anna used 1 1/2 cans of this paint, but she used a few coats to make sure it was covered well. Just to be safe, you may want two cans on hand in the event that you need more. Hope this helps!
Hi anna i really love your new bathroom, believe it or not I also have an ugly pink bathroom and I really want to change it. I’m from México do you know where I can buy this product?
I’m not sure if you can order the same products from Amazon that we can in the US, but if you can, here’s a link to the product – http://amzn.to/1PdtIdS. I’d love to see before and after pictures! 🙂
Hey Anna!
Great job on the tub. I see that yours looks like porcelain and tile. Wondering if you have any insight on other materials. I have a powder blue tub with the built-in walls. It’s plastic/fiberglass/who knows. $5K for a re-do isn’t in the budget!
Hi, Tammy. This is Anna’s assistant, Bethany. The Rust-Oleum Tub & Tile product is supposed to work for fiberglass as well as ceramic and tile, so it should work for you. Just make sure to clean your shower really well and then sand it so it creates a rough service for the paint to adhere to. Good luck on transforming that powder blue tub! 🙂
Thanks Bethany. Hubby has his sights on a full re-do (whirlpool, steam shower, etc)… I’m a bit more realistic. This is looking like the first warmer weather project (so I can open the windows)!
Did you use just one kit on the whole area?
Hi, Steph. This is Anna’s assistant, Bethany. Anna finished about 90% of it with one box, but then used a second box. She said she probably could have stretched the one kit, but she had 2 so after she finished she did a second coat with the other kit. Hope this helps!
I have been wanting to do this and was wondering if the paint has peeled anywhere? Do you have to regrout any spots in the tiles or can you just paint over it?
Hi Sandy! After a couple of years I only have a couple little places that started chipping and to be honest I think it’s whatever my new housekeeper was using to clean the tub because I had never had any problems before. So I’m back to being the one that cleans the tub but even after having a couple little areas peel (and I mean little, less than the size of a pencil eraser) I would still do it all over again. It looks SO good and it’s 100 times better than the old pink tub. 🙂
I didn’t have to do any regrouting, I painted right over the grout. I did peel off the old caulking though, and recaulked when I was done painting.
Hi Anna,
Did you have to do any sanding and what did you use to clean the tile and tub with before painting?
Yes, I sanded the tub down and used the powder Bar Keepers Friend to clean it. The directions on the box are very specific so you’ll know exactly what to do.
I see its been almost 2 years. How did it hold up?
Hi, Michelle! I’m Anna’s assistant, Bethany. A year after this post, Anna created a video to show you just how well it’s holding up. You can see that video here: https://askannamoseley.com/2015/02/rust-oleum-tub-and-tile-refinishing-kit-a-year-later/ And at nearly 2 years later, Anna said it is still holding up beautifully! Hope this helps! 🙂
I’ve been thinking about redoing our tub and tile but with no budget your idea looks very promising! What did you use to remove the caulking on the tub? Any products you used or would not recommend? Also you said you sanded the tub and tile before applying Rust-Oleum. Any helpful hints with that?
Hi, Desiree! I’m Anna’s assistant, Bethany. Anna just peeled off the caulking from her tub, but if the caulking on your tub is difficult to remove, there are caulk remover products and caulk removing tools available at most hardware stores. Anna just recommends sanding the tub really well so it creates a rough surface for the paint to adhere to, and she used Bar Keepers friend to clean the surface before painting. The box has very thorough directions, so following those directions is highly recommended. Once you’re done painting your tub, just make sure to use a gentle cleaner for regular cleaning. Hope this helps!
Will this work in fiberglass? I have a unit that is all one piece. What do you clean it with?
Hi, Sheila! I’m Anna’s assistant, Bethany. This product is also intended for fiberglass, so it should work well. Anna sanded it down and used the powder Bar Keepers Friend to clean it. The directions on the box are very specific so you’ll know exactly what to do. Hope this helps!
I can’t tell you how happy I am that I found your site! We just bought our first home that was built in the 20’s. We love the old character of the house , EXCEPT the green spackled tiling in the first bathroom. (from the waist to the floor. sigh) BUT seeing this post has given me hope that it could be amazing! Thanks so much!
Also, how did you get the caulking out of the tile completely? And did you just do around the seal of the tub or did you have to do in between each individual tile? 🙂
Hi, Tessa! This is Anna’s assistant, Bethany. We are so glad you are here! In order to remove the caulking, Anna just peeled it off of her tub, but if the caulking on your tub is difficult to remove, there are caulk remover products and caulk removing tools available at most hardware stores. When it was done being painted and had dried, Anna re-caulked the tub. As for the grout between the tiles, Anna just painted over it after cleaning it really well. Good luck with your tiled bathtub!
This looks absolutely fantastic. I love how the bathroom got a total makeover!! In love with your blog 🙂
What is involved in cleaning the tub before the paint? Mine is 40 years old and I love it except for the inability to get it clean. I had rust stains from a water heater and ruined the finish with rust remover. The current finish is rough because of that. So I really need to know what to do before I start this process..
Thanks for any help.
Ruth Roberson
Hello, Ruth! I’m Anna’s assistant, Bethany. Anna just recommends sanding the entire tub really well so it creates a rough surface for the paint to adhere to, and she used Bar Keepers Friend to clean the surface before she painted her bath tub. Hope this helps!
How did this product hold up over time? Looks great!
Hi, Jennifer! I’m Anna’s assistant, Bethany. Here is a follow-up post that Anna did one year later: https://askannamoseley.com/2015/02/rust-oleum-tub-and-tile-refinishing-kit-a-year-later/ It’s been nearly 2 years since she refinished the tub and it has still held up well. She did find a few little chips after a new house keeper used a more abrasive cleaner, but never had that issue with her regular mild cleaner. Hope this helps!
When you touch the tile, or step into the bottom of the tub does it feel like it’s been painted or does it still feel like a regular tub and tile?
It feels like a regular porcelain tub. 🙂
Hello Anna~
I love your white tub and shower!
We are looking for a house to buy, and unfortunately, we keep finding these beautifully upgraded homes with “amazing everythings”, and then there’s that one bathroom,,, hahah… so I stumbled across your project while preparing for an ugly bathroom. The question is, what kind of tub do you have? I am assuming not a fiberglass tub, probably a enamel tub? Wonder how many different surfaces this product would work on?
Thanks
Joy
Our tub is a porcelain tub with ceramic tile walls for the shower. I believe the product says it works on fiberglass too. 🙂
Hi there!
Shower looks awesome! As everyone else has asked – now that it’s been several years since you used this product, has it still held up? I’m contemplating purchasing a home with a hideous master bath and this product is probably the only reason I am still considering the home!! The walls have four feet of tile on them, in addition to the shower so it would be a big undertaking!
Thanks in advance for your feedback!
Hi, Susan! I’m Anna’s assistant, Bethany. The tub has held up very well with every/other day use for the last two years. Here is a video update she did one year later: https://askannamoseley.com/2015/02/rust-oleum-tub-and-tile-refinishing-kit-a-year-later/ In the last few months, she noticed a few small chips in the paint (the size of a pencil eraser), but she thinks it’s only because her new house keeper was using a harsher cleaning product. Prior to this, Anna did not have any chips or issues using a mild cleaner to clean the tub. Hope this helps!
Hi Anna! I just came across your blog via Pinterest, and I’m so excited!!! I am a newbie to DIY home improvement, and had a couple ?s. Do you have to remove the caulking? Also, do you simply paint over the grout?
Thanks in advance
Hi, Luna! I’m Anna’s assistant, Bethany. We’re glad you’re here! Anna did remove the caulking before painting and she did paint over the grout. Hope this helps! 🙂
Hi Anna, my husband is looking to do this next weekend, and we have watched both video’s, big help! Thanks! The one question we haven’t seen anyone ask, and was not addressed in either video is the time. How long did this take to paint? I know you said you did two coats & an hour between them. But wondering how long each coat took, approximately? Thanks in advance. ?
Great question! It’s been awhile since I painted them but I want to say I was done with the whole thing in under 2 hours. Honestly the prep work – sanding, removing grout, etc. is what takes the longest. I’d love to see before and after pictures, if you have time to snap some! 🙂
I was wondering how long it has been now since you painted the tile and how it is holding up to scrubbing off soap scum and such.
Hi Jennifer! The tub has held up very well with every/other day use for the last 2 1/2 years. Here is a video update I did one year later: https://askannamoseley.com/2015/02/rust-oleum-tub-and-tile-refinishing-kit-a-year-later/ About 6 months ago, I noticed a few small chips in the paint (the size of a pencil eraser), but I think it’s because my housekeeper at the time was using too harsh of a sponge. I haven’t noticed them getting any worse since I stopped using her and prior to this, I did not have any chips or issues using a mild cleaner to clean the tub. Hope this helps! Honestly though, even with the few little chips, I would still do it all over again because the tub looks amazing and it’s WAY better than the pink that used to be there!!! 😉
Hi Anna, I love, love, l9ve the idea of painting old tile. The grout on our bath tile needs a little repair. Do you suggest any grout!regroup prior to painting?
Thank you, Cary
Yes, definitely repair the grout before painting. If it’s in a shower, you need to use sanded grout, you can buy it at most hardware stores and it comes in tons of colors. 🙂
After debating this project for months and reading dozens of blog posts and reviews, I felt ready to tackle it = less than two weeks before our open house. I figured bright white tiles would be so much better than 1990’s blue, right?
Prep started off simple enough – tons of scrubbing. Removing fixtures. And removing caulk. 90% came off just by pulling it. The remaining 10% took two days, a small fortune in useless specialty caulk-remover sprays and tools, and an endless amount of mind-numbing work to remove. And even then we didn’t get it all. Lesson one: Just because caulking looks loose doesn’t mean it will all come off easily.
Sanding the tiles was an exercise in frustration. Three different grades of sandpaper, plus a pricey “wet” sandpaper, did absolutely nothing. So, as per the kit’s instructions, I used RustOleum’s ‘etching cream” (Another pile of money) and, to the stuff’s credit – it did indeed dull and etch the tiles. Finally, we were ready to go.
Except we weren’t . How do you get this etching goop off your tiles when you’ve removed all your shower fixtures so you can properly clean and coat the tiles. And you’ve removed all the caulking, leaving a generous seam to let water stream into your wall. So I end up engineering a device using a Swiffer and my husband’s old socks and washing it off that way. It took hours. Water still got everywhere it shouldn’t. And then it took hours to fully dry.
By now, we’re three days in and down $50 for the kit, $35 for the etching cream, $20 for the sandpaper, $20 for brushes and various applicators, $45 for the respirator mask and approximately 1 million dollars in coffee.
As per the kit instructions, we carefully mixed up part A and then added the part B, and diligently mixed some more. This stuff has the curious viscosity of being thinner than water. Every single paint brush we used just made the stuff roll right down my arm. Three days later I still can’t get it off my skin. It wasn’t until we used foam brushes that we could get anything to stick to the walls. This is the messiest thing you will ever do and you should absolutely use the spray option, not the brush option.
The first coat looked absolutely horrific. It would not adhere. The drips were everywhere. If a rabid whale had been in my bathroom and vomited on the walls things would have been neater. BUT everyone says the first coat never looks great so we forged ahead with the second coat.
Except there’s only enough for part of the second coat. The kit says you will have enough for two coats on a tub and the surrounding tiles and though I’m not doing the tub I don’t even have enough for just the walls. So we have to buy another kit. And more brushes. And the fumes are so overwhelming and as we’ve been without a tub for three days now, we check into a hotel for the night.
After FOUR coats we still cannot achieve a uniform color. The streaks and unevenness with coat one are still on full display. And the texture is absolutely horrible. Every single brush stroke is evident.
So if you stand back and squint, yep, there’s great white tiles. But if you put the lights on or stand close, it looks absolutely awful. Now either we missed some massive step between reading and re-reading the instructions, dozens of blogs, and talking to the hardwood store people or maybe we are utterly inept, despite never having trouble with any other home reno. But we’re $300 plus in, we’re on day 5 without a tub/shower, I wouldn’t wish the insanely messy, toxic, inefficient process on my worst enemy, and now we need to hire an emergency handiman to gut the tiles and replace them with new ones as there is absolutely no way to list a house like this. I cannot emphasize enough how much research we did, how careful we were, and how absolutely horrible this looks (and smells!)
I’m thrilled it worked out so well for you and many others. But it’s buyer beware for me.
Hi, I’ve been considering doing this…my tub is white (yay) but the shower (entire way up the wall) is pink tile and so is the top of the vanity. I already painted over the pink walls. The ENTIRE bathroom was pink! Anyhow, my biggest concerns…does the paint hold up well over the grout? Also, I have some raised flowers on some of the tiles…such a wonderful decorative touch (sarcasm). What’s your opinion of this? I’d like to get rid of the pink but would a row (and some random) tiles with raised flowers be strange?
Thanks for your input.
i have the ame set up with the tile. did one kit do the trick? do u mix it in the one gallon can? i have a cast iron tub. it works on that right? thank u. this has been super helpful.
Yes, it will work on cast iron. I used 1 1/2 kits, so I’d recommend buying 2 kits. The directions are very specific and will tell you exactly what to do and how to mix it, you will not need a gallon bucket. Good luck! 🙂
Hi, Question for you!
My shower looks almost exactly like this! (ugh) BUT the flowers on mine are raised…were yours just a print on the tile or raised? Also, my bathtub is white, although this is great, do you think I should still paint over it to make sure it matches the painted tile (or just leave it)?
thanks for your input!
The flowers on ours were slightly raised. If you look at it from the side you can still see the outline of them but it’s not obvious at all. I think I did 3 coats though, to make sure they were covered well. Painting the tub is up to you. The colors will probably be slightly off because this is a really bright white but if you just do the walls there’s less of a chance you’ll ever have to deal with scratches or chipping. I hope that helps. 🙂
*Slow clap & standing ovation*
OMG,it looks amazing. I have 2 bathrooms I really need to do. I have tile around the shower and the walls halfway. How many kits did you use?
It took 2 kits for my bathtub/shower. I would buy at least one more than you think you need because it’s better to be safe than sorry. 😉
OMG that is beautfiul!! Will definitely transform my bathroom next summer!! O:
I live in an apartment that is dated. While the tub and sink are in DIRE need of a refinish (rust is coming through the worn finish), the bathroom is very small and there are no windows. I also have two cats and a pomeranian. Would you suggest I go ahead with the project as lack of ventilation is something I am a bit fearful of?
I wouldn’t recommend using this product unless you own the space. If for some reason something went wrong you could get in a lot of trouble with your landlord.
Do you know if the 3M product can be tinted? The white is crisp and clean, but I want a more masculine look for my bath, say a gray. We did a total bath remodel in our master bath, but removing tile from a mid-century home is almost futile – they’re set in concrete! We had pros for that.
Thanks for the tip on painting the tile in the less wet areas; I’ll have to find a good primer/paint for that project. We just had our exterior brick and siding painted using Sherwan Williams “Super Paint,” which, as described to me, is paint and primer all-in-one – wonder if that would work.
Thanks for the tutorial.
I wouldn’t tint it, I’m pretty sure messing with the “paint” might not make it self level and finish with as hard of a finished coat.
Anna can I use this same product for my counter top and sink which is all one piece. Possibly cultural marble, it’s the old sink and counter in one that was sold 20 years ago but may be a faux marble. If not what would you recommend to use? Thank you
I think the product would work, based on my experience but I would double check with the brand just to make sure they think it would be a good fit.
I know this is an OLD post, but I have a crazy question… how did you paint your second coat on the walls since you had painted the floor of the tub?? I’m getting ready to do my stand-up shower and can’t wrap my head around how to get to all the areas without standing inside!!
Oh man, I’m sorry for the delayed response. The paint dries pretty quickly so usually when I was done with one area I’d test the other area, with my fingers, to see if it was dry enough to move back to it. I waited an hour or so between the 2 coats but I probably didn’t even need to wait that long.
Wow! Never in my life have I seen a blogger reply for 4 years after a post. You are a saint! Thanks for the great info and review. We will be trying this soon and appreciate all the information in the original post, updates, and comments.
You are very welcome! 🙂 I hope it turns out fabulous and you love the results as much as we did!
It turned out great after some hiccups. When I started painting, I realized the paint was not white. I immediately called Rustoleum who had me look at the bottom of the can. It was stamped “Almond.” They were very nice and sent me a replacement (originally purchased from Amazon). So even if your box says White, check the can to make sure it is stamped White. It took all of two packages to paint the tub and the tile surround. I had trouble with the foam rollers since they disintegrated. Next time I’ll use a low-nap for bath/kitchen.
Awesome! I’m so glad it turned out and that Rust-Oleum was so great to work with. I hope you get to enjoy the bright, clean and new finish for a long time!! 🙂
Hi Anna!! I used this product years ago to cover some ugly pink tiles in our bathroom. I got 10 YEARS out of the paint, before I repainted. (With more Rustoleum) This was a shower/tub combo that got used almost every day and cleaned often. When we moved to our next house, the 1st bathroom I tackled was our guest bathroom. Let’s just say I went from Brady Bunch 70’s house to a house where 90210 threw-up all over!!! Mauve/aqua/lt. pink swirl with gold accents, for tile. I would HIGHLY recommend using a respirator-type breathing mask (I got mine at Menards along with the paint) and use gloves. I just used the disposable ones. People SERIOUSLY can’t believe that I painted the tile, and that it holds up so well. LOVE this product!!!!!!
Awesome!!! Thank you so much for sharing Jennifer. 🙂
This looks amazing. We just bought an old house with brown ugly toilet and basin and the tiles have been painted with normal paint. It’s an ugly bathroom. Wondering if this would work over toilet and basin and the painted tiles. Do I need to sand the painted tiles or is it ok to just clean them and apply it on to OF the paint??
I wound’t bother with the toilet, it would probably be best to just get a new one. As far as the tiles, I’d recommend sanding the old paint off because if you paint over old paint it will probably end up peeling and not giving you the best result possible. Hope that helps. 🙂
Hi Anna,
I noticed this was done in 2014. How has it held up for the last 5 years ??? And will it work on a fiberglass / acrylic bathtub. You may have already been asked this question, but I didn’t want to read your 200+ comments from your followers.
I’d appreciate your response and I thank you for the information and your blog is and awesome source.
Sincerely,
Tanya Arias
Hi Tanya! We moved out of that house last year but up until then it had held up really well. Here’s a link to my FAQ page (https://askannamoseley.com/2018/07/rust-oleum-tub-and-tile-faq/) which will hopefully answer all your questions (so you don’t have to read through the comments). 😉 Feel free to email me though if you still have other questions. 🙂
Good Job! You’ve laid out your steps for everyone in great detail! I too had one of those 60’s colored tubs, mine was the green! Yikes… The tub was still in great condition so I decided to also paint it.
I researched the epoxy paints because I had heard that was the only way to go. I however, used Klass Kote Bathtub Epoxy because they were able to make a custom color for me which I wanted. (www (dot) klasskote (dot) com/epoxy_bathtub_paint) Thought I’d post since I’m sure others out there wish custom colors too and this was the only place I found who had a custom match service. The process was pretty much the same with a few minor exceptions. Results were great! It was such fun…really! Thanks for sharing the possibilities to other brave souls.
I never knew that was even an option! Thank you for sharing Linda! 🙂
Hi Anna, I love the post. I’m excited about trying this but we can’t get the sandpaper to knock the gloss off and we even tried 80 grit. Any other suggestions?
Thanks
Hi Samantha! The sandpaper won’t knock the gloss off all the way, just use it to scuff up the surface to give the product something to adhere to. Hope that helps! I’d love to see before and afters. 🙂
My tub isn’t ceramic. I think it’s plastic. It is not a smooth surface. Would this product work on it?
I would email the manufacture to make sure it would work. I think depending on the type of plastic, it might work, but I would definitely check with Rust-o-leum first. 😉
Hello there,
I am wondering, how long did you wait to re-caulk everything? Rustoleum doesn’t have this information on their web-site.
Hi Margaret! I re-caulked everything the next morning after it had been dry for about 24 hours. I think it just depends on how humid it is in your house. If you have a small heater I’d put that in the bathroom to help it dry faster. 🙂
Do you know if this product works on steel tubs?
I don’t know, I would contact the brand to see what they say.