In my entryway makeover post on Monday you probably noticed that we had also done some work in the dining room. I’m still working on the makeover but today I’m going to share how we added a little drama to the room, with this board and batten tutorial. I’m also giving away a HomeRight paint sprayer so make sure you read all the way to the end!
We had board and batten in the entryway of our old house and I LOVED it! I love how the bright white boards catch the eye and demand your attention. It’s a great way to make a room look expensive, without actually spending a lot. Adding it in our dining room cost us less than $300, and in my opinion it looks like a million bucks!
Board and Batten Tutorial, here’s what you need:
- Back boards (like these ones from Lowe’s)
- Liquid nails
- Moulding
- Nail gun and nails
- Large level
- Planer (optional)
- Caulking (this is the one I used)
- Wood filler (this is the one i used)
- Paint sprayer (this is the one I used)
- Drop cloths
- Painters tape (this is what I used)

Okay, I know I’m getting ahead of myself, but I just couldn’t wait to show you how good it turned out! Back to the tutorial…
The first thing I did was paint the top half of the walls. I figured it would be easier to paint them first, instead of having to tape everything off after the B&B (board and batten) was installed. I’m in love with the color, I found it in my Ballard Designs catalog, it’s Kendall Charcoal from Benjamin Moore.
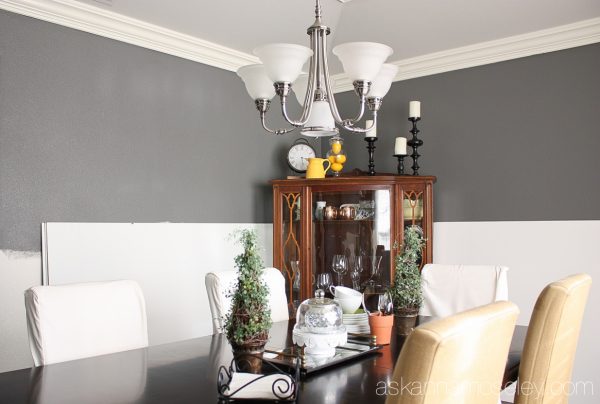
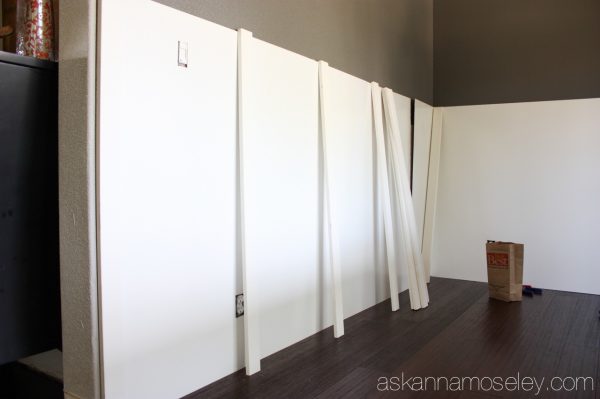
When the paint was dry we measured all the back boards to fit them to the walls. In the process of doing that we also decided how far apart we wanted each of the vertical boards to be so we would know where to make the seams.
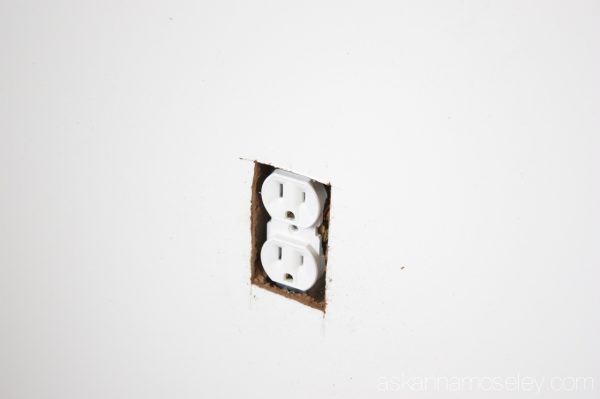
When you install B&B make sure to cut holes for all your outlets and light switches, before gluing the back board to the walls!
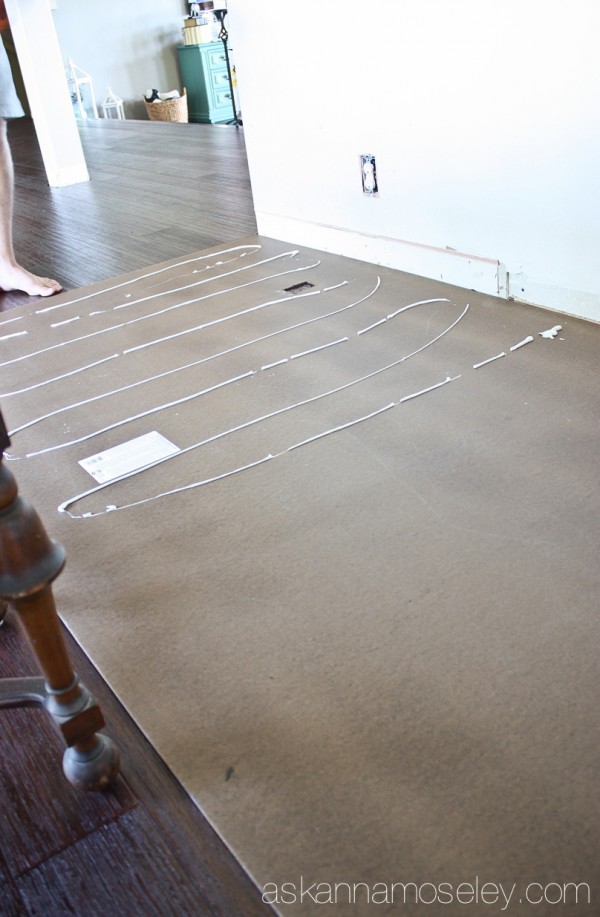
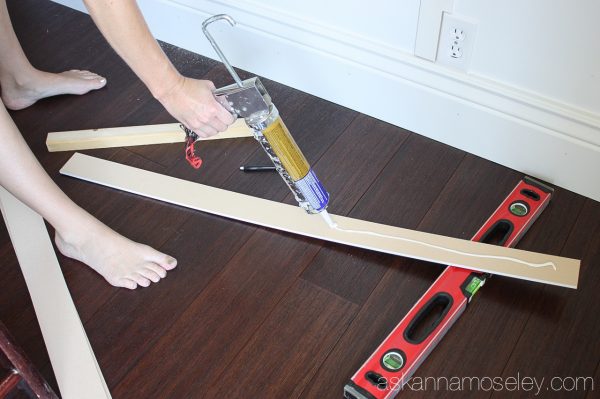
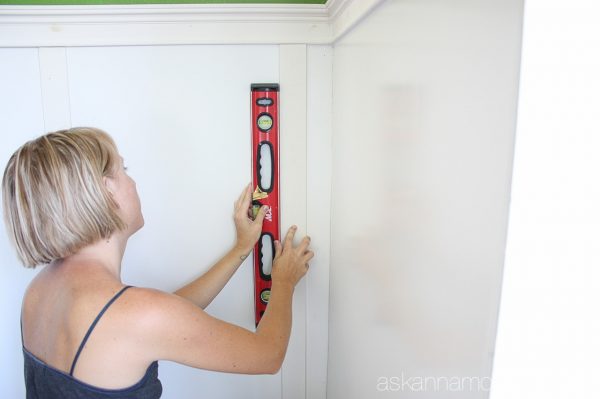
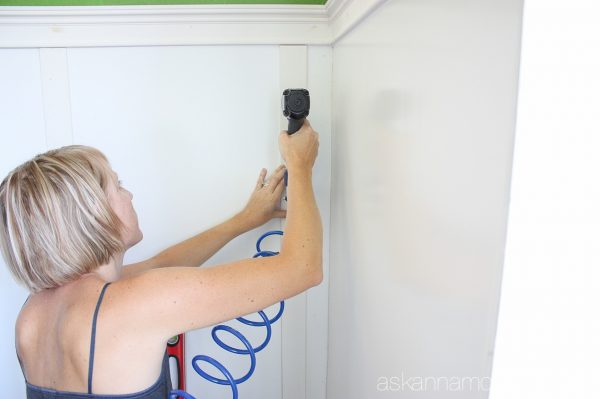
After each of the boards were measured and cut, we laid them down on the ground and put Liquid Nails all over the back of it. Then we lifted it to the wall, leveled it, and my husband nailed it into place while I held it.
Once all the back boards were in place it was time to add the moulding on top. We bought the same moulding we had used in our old entryway because we loved it so much the last time.
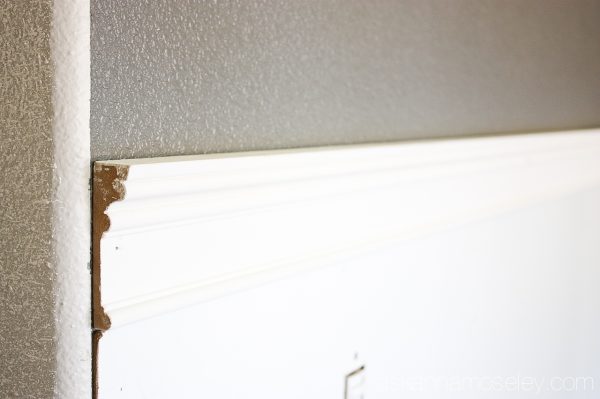
To install it we did the same thing we did with the boards. We measured and cut it, placed a strip of Liquid Nails down on the backside of the moulding, I held it in place and leveled it, then Matt nailed it in with a nail gun.
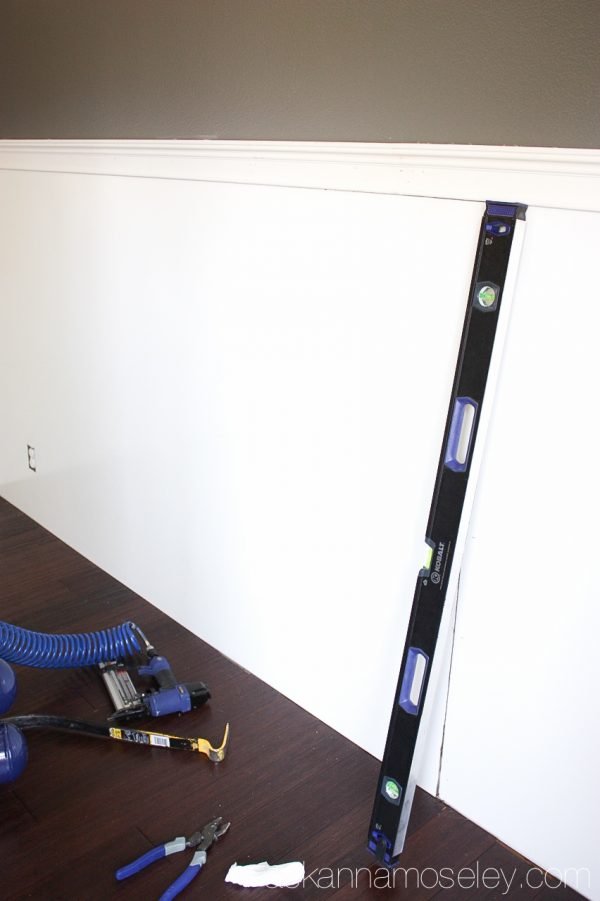
It was hard taking pictures of this process since both of us were working to get the moulding on the wall, but here’s a picture of our handy work. 🙂
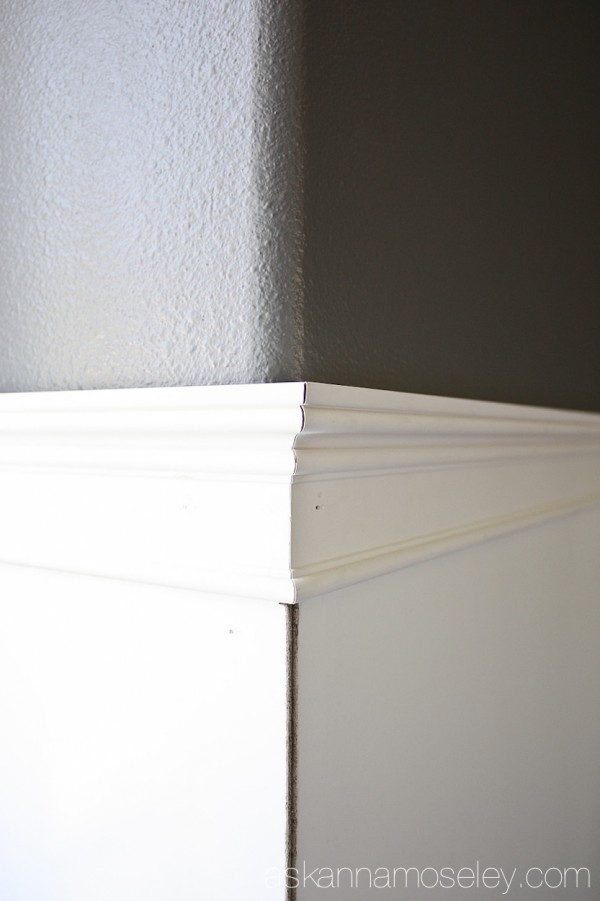
Once the back boards and moulding were installed it was time for baseboards and the vertical boards. We haven’t had baseboards on the main floor since we installed our new hardwood floors last winter, so I was SO EXCITED to finally get baseboard installed!!!
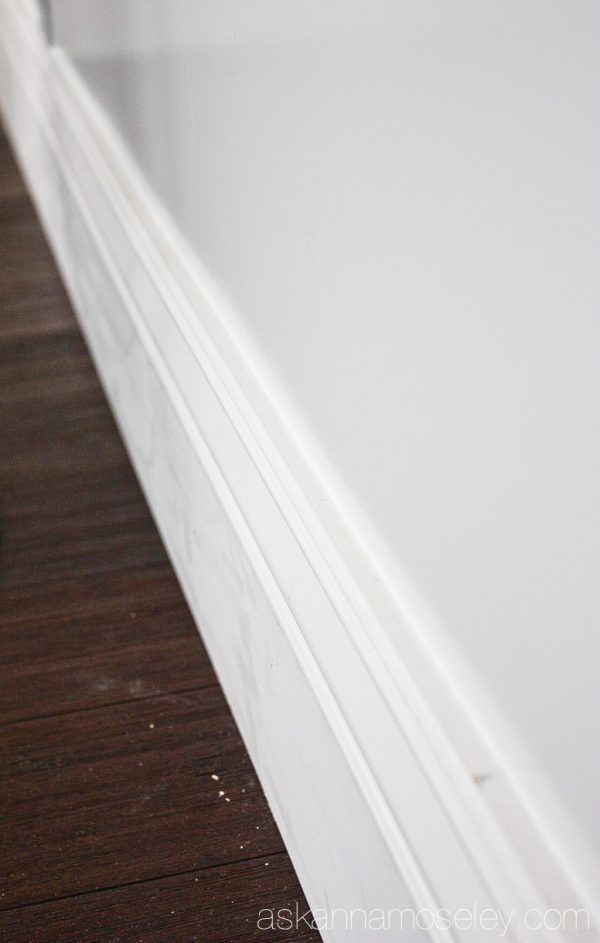
While Matt worked on measuring, cutting and installing the baseboards. I got to work installing the vertical boards. The only problem was the moulding we had chosen for the top, was thin at the base, so we had a big ledge at the top of the vertical boards.
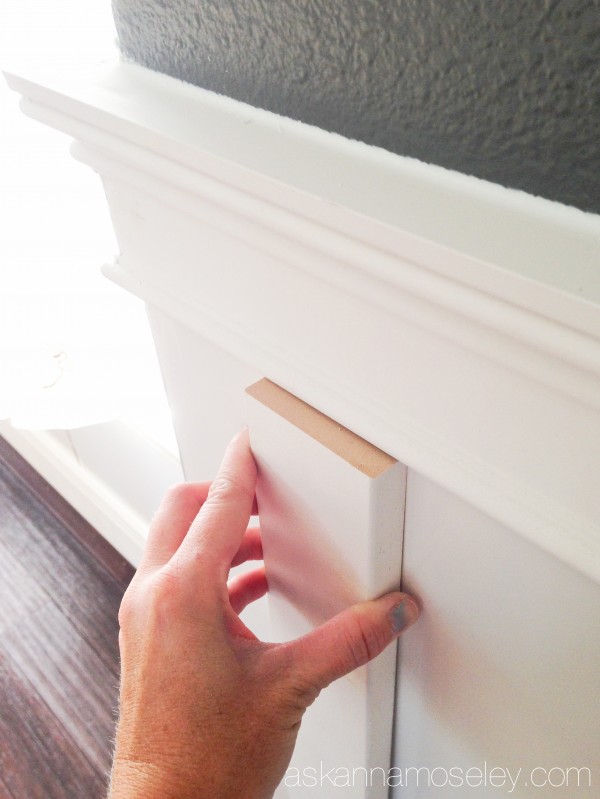
I knew this would drive me absolutely BONKERS so I called our good friend, who owns a planer, and asked him if I could come over and plane the boards down. If you don’t know what a planer is, it’s machine that basically “peels” off layers of the boards to make them thiner. Here’s what the board looked like after planing them.
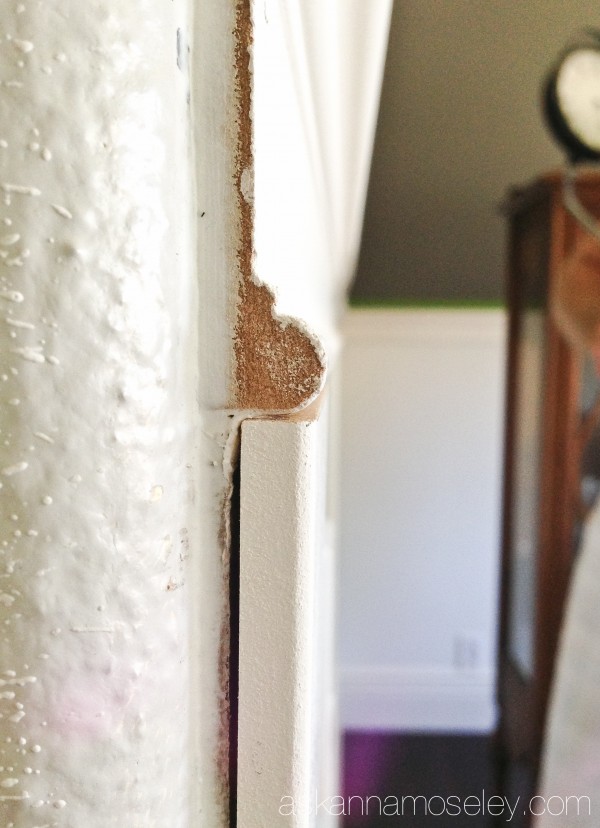
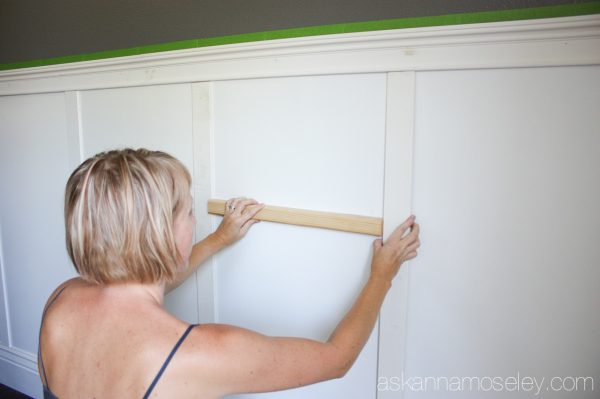
If you don’t own a planer, or know someone that does, you could also rip the boards with a table saw, or chose a thicker molding for the top. Once all the boards were the right depth, I got to start installing them. To make it faster and easier, I cut a scrap piece of wood/stick to 19.5″, which was the distance we wanted between each of the boards. This made it so I didn’t have to stop and measure between each board.
I installed my first vertical board and after that I was able to use the stick to get to my next starting point.
After I determined my starting point, I put wood glue on the back of the board, placed it on the wall, leveled it out and then used a nail gun to nail it into place.
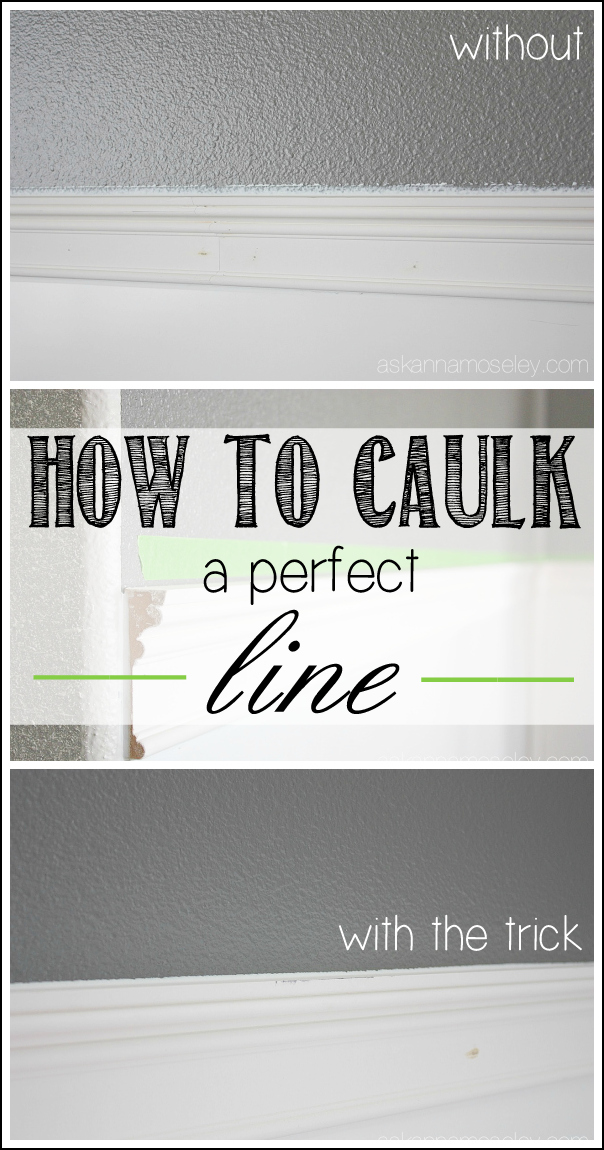
Once all the boards and baseboards were installed I caulked every seam and every crack. Honestly this was the most tedious part of the whole installation, it probably took me about 1 1/2-2 hours to caulk the boards, mouldings, baseboards and all the corners of everything. But when I was done it made a huge difference (and I could barely move my hand)! If you haven’t seen my post for how to caulk a perfect line then check out the post HERE. If you don’t want your caulking to crack over time make sure to purchase Flex Painters Caulking.
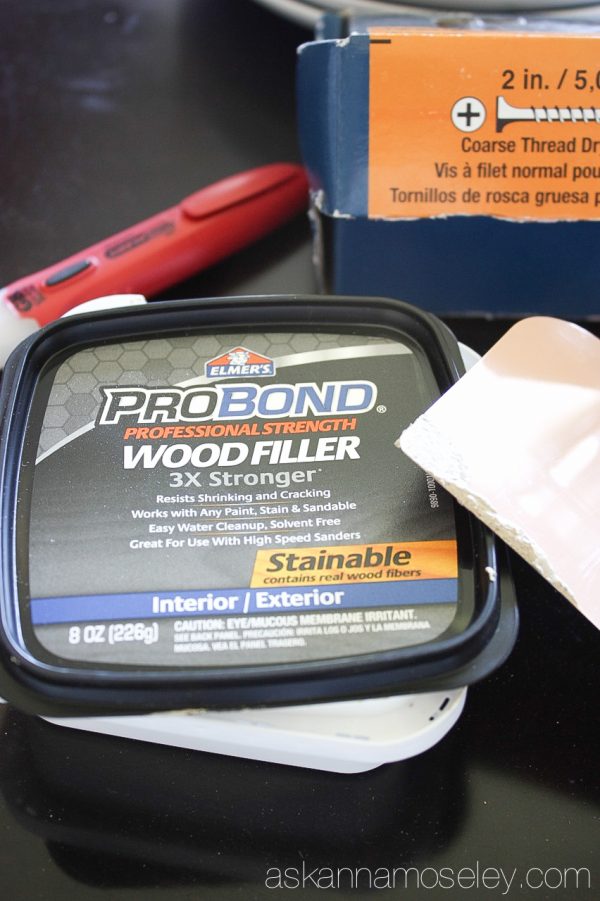
I also filled in all the nail holes with wood filler. It’s important to use wood filler for your nail holes, and not caulking, because caulking will “sink” and not look as smooth and finished. These two steps are super tedious but also very important!
After all the installation was finished the dining room was ready to be painted. In our other house I hand painted all the boards, which took forever, so this time around I decided to spray them with my HomeRight Finish Max Pro Fine Finish Sprayer.
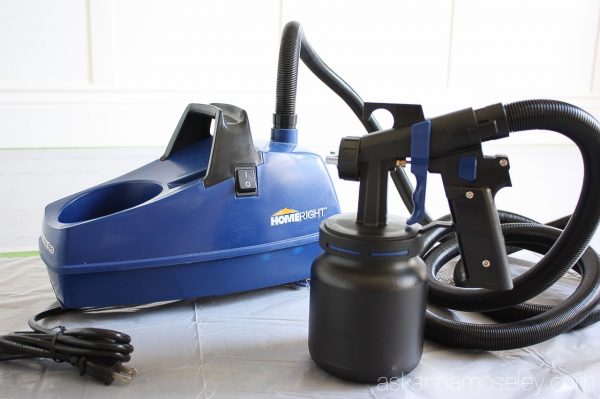
To protect the walls, floors, etc. I taped everything off with plastic drop cloths and FrogTape.
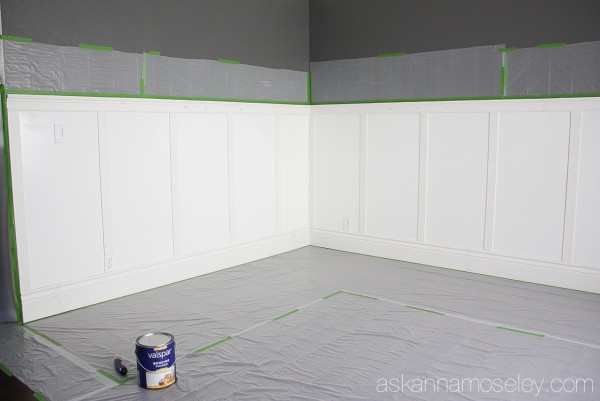
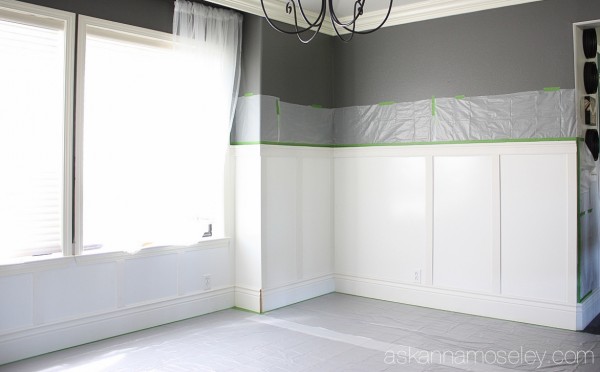
And then it was time to spray!
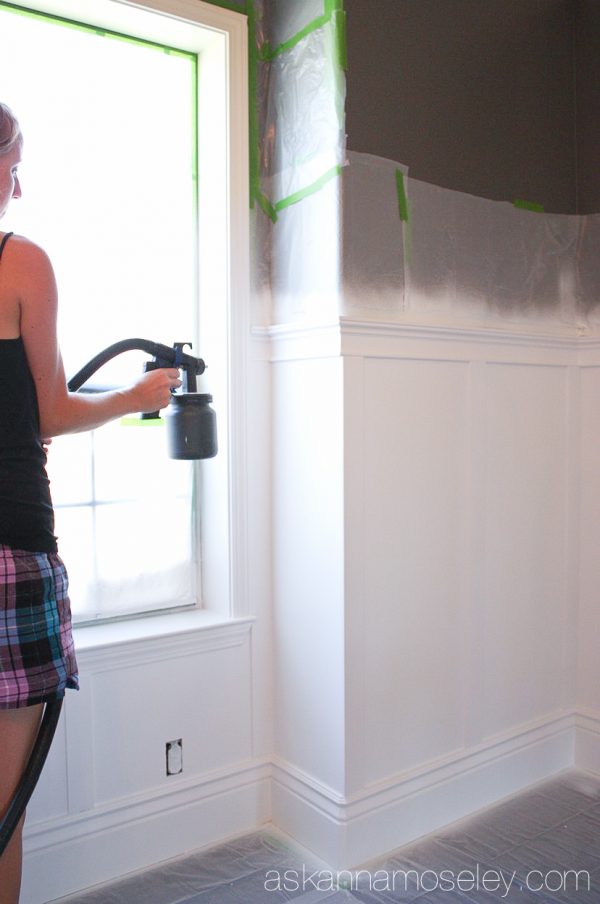
Okay, so remember how I told you how much I loved the Finish Max HVLP sprayer when I did our kitchen makeover? Well I still love it but let me tell you, the Finish Max Pro is AMAZING!!! I couldn’t believe how fine the paint came out and went on the board and batten. The spray comes out so perfectly that it looks like a professional painted it. Every time I’d stand back and look at what I had just painted, I would give myself a mental pat on the back. Of course it wasn’t me making it look that good but it looks SO good that I couldn’t help myself!
The only negative thing I can say about the Finish Max Pro is that it creates a lot of dust. With the attached turbine it lays down a professional grade layer of paint but the dust ends up everywhere. If I had known this I would have put plastic up to protect the other rooms in our house, but instead my entire house looked like this.
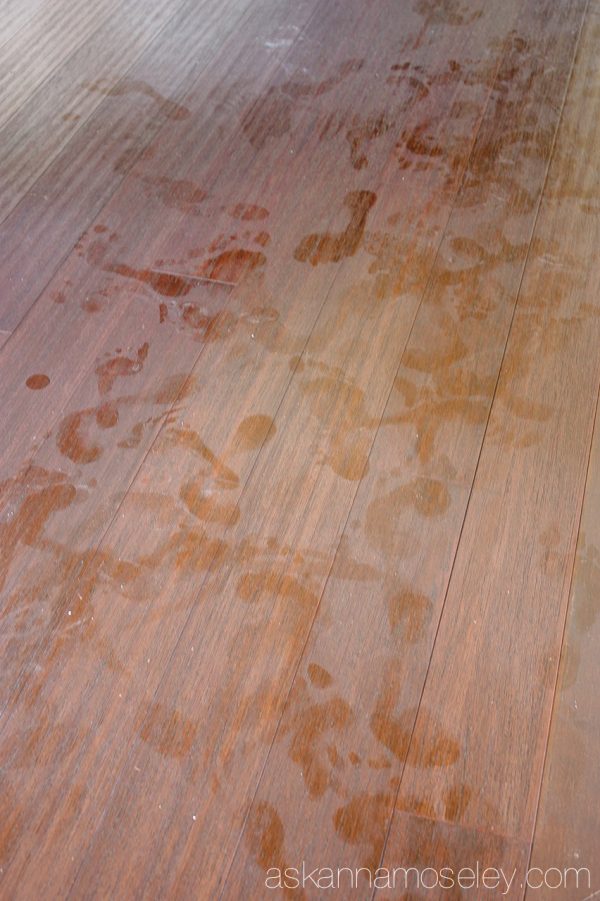
So get the sprayer, use it, give yourself a pat on the back because your paint project looks like a million bucks, but make sure you tape off the entire room first so dust can’t escape!
Okay, I’m back from my tangent. It’s so hard to show you in a picture how beautiful the board and batten turned out but I’m going to try.
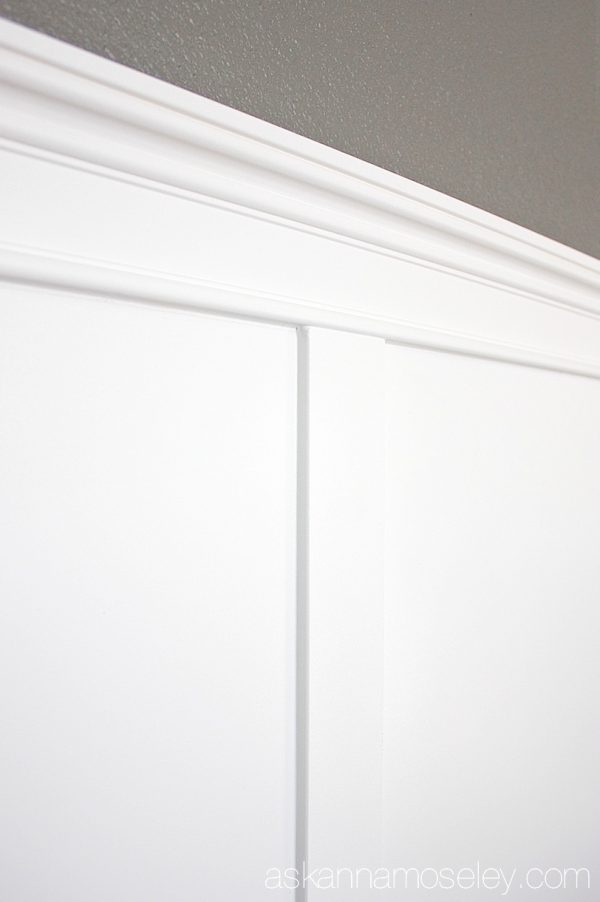
I just can’t believe for how little we spent, how much more expensive our dining room looks. And it has baseboards!!! Ahhh, I’m seriously giddy over that!
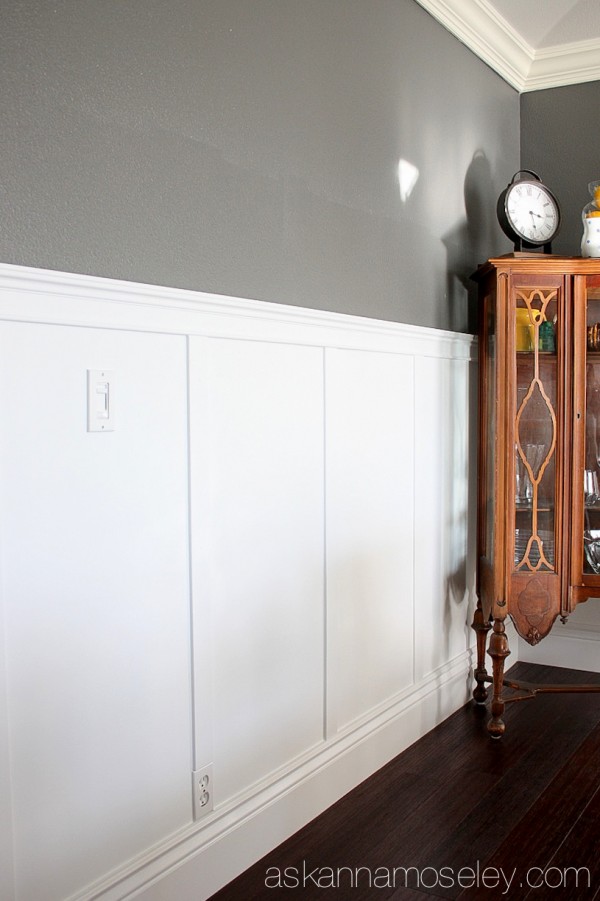
I can’t wait to finish the rest of the makeover and show you the finished product! My goal is to have it done before Thanksgiving so we can enjoy our meal in a beautiful room instead of on the sub flooring like we did last year. 🙂
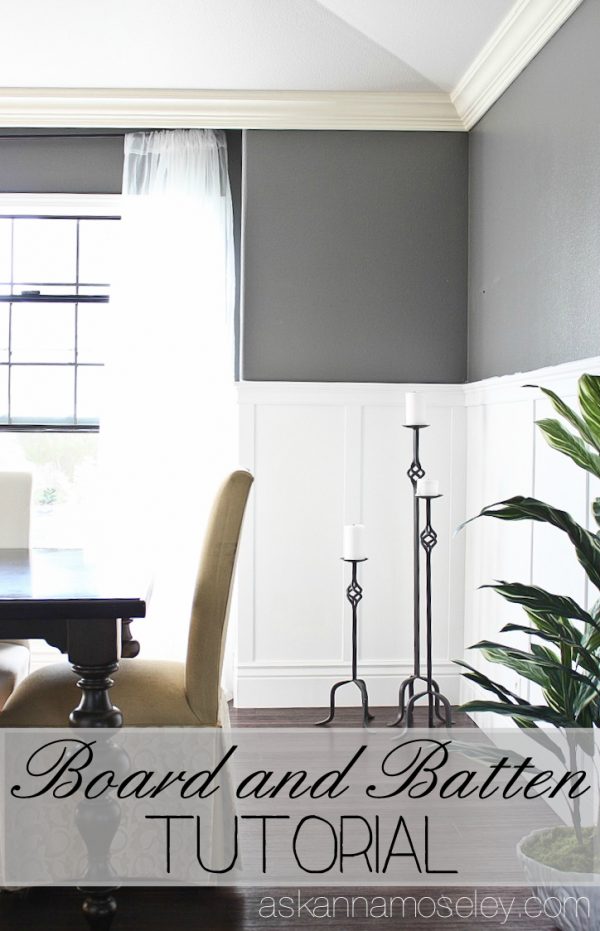
What do you think of our new board and batten?

Disclaimer – This post is sponsored by HomeRight but all opinions are my own. I will always tell you if I think a product is just “okay” but if I tell you I love it then it means I really LOVE it! This post contains some affiliate links, for your convenience. Click here to read my full disclosure policy.
We used a power sprayer this past summer to paint the outside of our rental house and we LOVED it! We completed the whole job in about 3 hours. It was so easy and the coverage was great. We said for any future large paint job, we are using a sprayer.
I would love to try this same project but,yes, it scares me!
We just purchased a new home and we need to paint every room, the kitchen cabinets and all the ceilings (after we remove the popcorn) This would come in handy.
Thanks for the detailed step by step instructions! Your dining room looks great. I love reading all your great tips and suggestions for DYI and decorating ideas. We’re currently looking at buying our “forever” home and your blog is helping me see the possibility that exists with many of the diamonds in the rough we’re encountering. I do have a question for you. I’m wondering if the HomeRight Finish Max Pro Fine Finish Sprayer would work for painting walls as well as staining a fence. I’d like to make an investment in a sprayer that will meet many of our future needs. Thanks for your help.
It would definitely work well for painting walls but personally I wouldn’t put stain in a sprayer because it would be really hard to clean (since it’s oil based). For staining HomeRight sells a Stain Stick which works the same as the Paint Stick I gave away. You can check it out here – http://www.homeright.com/products/stainstick-stain-applicator.
We have a project house and now I HATE painting anything. We painted every room, some more than once, all of our cabinets, doors and all of the trim. We just installed new doors and now we have to install new trim around them, and I am dreading painting the new trim and I am not fond of the “prepainted” trim as it isn’t very white or its that plastic/particle board that cracks when nailed. Would love to use a power sprayer on any project in the future!
Would love the sprayer to get to work on some dressers that need updating!
It looks AMAZING, Anna! You did such a good job – I love it!
Thanks friend! 🙂
This turned out so pretty! I love board and batten and hope to install some in our new place!
I’m intimidated to do my living room. It is so huge. I bet this would make it so much easier.
Beautiful room!! I’ve always wanted a paint sprayer. After reading how your experience went, I think this is the one for me! Would love to win it!!
This would come in handy to finish our bathroom project!!!
I want to paint my pantry doors with chalk paint.
We have a large six foot high stucco and brick fence surrounding all of our back yard that is seriously covered in mildew and algae. I really want to pressure wash and paint it myself, and the paint sprayer would be amazing!
I have some stand alone cabinets in my kitchen that I want to paint to match my other cabinets. What a blessing this paint sprayer would be!
Wow I love this blog!
We just bought a fixer upper and gutted the upstairs. We are planning on doing wainscoting and this would be great. Great tutorial. Thanks for the inspiration!
We are about to redo our basement, which will include some board and batten…which I am beyond thrilled about!! My hubby will get his much needed bar space and this girl gets some B&B!! Woohooo!! I have read many tutorials and I LOVE and so appreciate the pictures you provided with yours, even with as difficult as it was to take pics while working. The paint sprayer would be a gem to have for this project and many more along the line! Thanks for sharing,,,and enjoy that Thanksgiving dinner…in style! All my best~Christy!
How I would love a Max Pro Fine Finish Spayer to tackle my bedroom:)
What a beautiful job, the room looks great! I love the walls. Painting is hard and just about any painting job becomes overwhelming for me! I think the one that is the most ominous is the idea of the kitchen cabinets, so as it is something I would like to do I just keep putting it off. Maybe someday!
Oh Anna, it looks beautiful!! How I wished we lived close so you could help me with this!! I have been bugging my hubby to do this for years, ever since I saw it on Thrifty Decor Chick’s blog!! 🙂 I hope I win this sprayer because it would make the project go a lot quicker and easier, which is great with the new baby and all!! 🙂
Thanks for the posting and the review of the sprayer. I really want to use one for painting furniture and for the redo of my bathroom cabinets so the finish will look more professional and less DIY. I will try to remember about the dust!
Painting our outside decorative picket fence that has 10 kajillion little pickets that are small and scrolly! UGH!! I truly think I’d rather light a match to that fence than paint the dang thing! 😉
I can’t tell you how long I’ve been drooling over buying a paint sprayer. Every time the hubs and I are at the home improvement store I somehow always make my way to the sprayers…and I ALWAYS mention how pretty soon it will be my birthday/Christmas/half-birthday/Mothers’ Day/Friend Day etc… Because both bathrooms (walls and cabinets), hallway, living room, kitchen cabinets and our furniture set all need to be painted!!!
We moved into our house in 2008. All our rooms need to be re-painted. This would make that process so much easier! – Karen
We built our home 17 years ago. Now that our (amazing) boys are in college, it is time to update a little here. I have a kitchen table set that belonged to my grandmother. One of our boys took it to college and brought it back home this summer. I am dying to refinish it. a little scared too. We need to paint EVERY room and hallway here. Oh yea, I wan’t to paint the front door and the garage doors too 🙂
What an amazing job, the paint sprayer gave it such a professional look, it’s so crisp, I love that there are no brush strokes, as if you magically waved a wand and it became painted. I’d love to use a paint sprayer on my outdoor wicker set, I tried with spray cans and gave up halfway through, it’s brown (the original color) with white (prime) and green, I guess you could call it camo right now.
I love your board and batten. It looks beautiful! We are going to be painting our kitchen cabinets white and this sprayer would sure make the job easier.
We really need to paint a fence outside. This would help out tremendously in getting it done much faster! Thanks for the giveaway and the great posts!
I have several large pieces of furniture that need to be painted. A huge kitchen table with 6 chairs and a large china cabinet and buffet. Having this sprayer would help me get over the anxiety of painting these pieces.
I would love this to paint a couple of rooms.
My dining room and stairwell!
Hello, well it must be the painting of my dark stained, out of the 70s pine dining table, because I have the paint but just have not got up enough courage to just do it. I didn’t really know how I was going to do it but the more I read about the HomeRight Finish Max, the more I am convinced this is the tool for the job. Thanks for a great giveaway!
Oh man!! I just finished painting our playroom and it took me a week because I could only paint during nap time and after the kids went to bed!! I could have finished it in 1 evening with a sprayer!!! Considering this is the first of many rooms o wany to paint this would be awesome!!!
I am most intimidated by ceilings! especially where they meet the wall & beams…
Laminate bookshelves!
This would be awesome for my basement project coming up! I would love to have it for that:)
I’d like to paint my chilhood dresser and desk.
I would paint my daughter’s bed frame! It’s been sitting in the garage for months!!
I have a standard FinishMax and enjoy it immensely. I was sold when I had to paint an antique high chair with tons of nooks and crannies. Flawless. The project that scares me a little to paint with a sprayer is our den ceiling. Spraying would be so much faster but oh, the mess!
Walls, new trim, cabinets…you name it! We are renovating a 30-year old house from top to bottom, and this would come in so handy!!
I’ve been putting off painting our cheap manufactured home kitchen cabinets because the thought of all those steps gives me nightmares.
I’ve been toying with the idea of adding some board and batten to a bathroom, so I was happy to see this tutorial. It looks amazing! And there are approximately 1564 paint spraying projects I’d like to tackle at home, so I’d love to win!
I would really like to paint the cabinetry in my kitchen and bathroom so they look better, but I’m afraid of messing it up. I bet a paint sprayer would help a lot!
First off this is the exact project I’ve been telling my wife we should do in our hallway. The most intimadating painting job I have to do is my front wrought iron fence I started I. it months ago using a roller and stopped because it was such a pain,
I need the paint sprayer to paint my master bathroom! Cabinets & all!
You have really transformed your house!! It looks amazing!! If I may ask a question about your kitchen post? Did you order your doors and drawer fronts from a big box store?
Thanks for all your DIY instructions. =)
Your dining room looks fantastic!
I have an old armoire that has been repurposed as a pantry that I would like a very smooth paint finish on to match my kitchen.
I have a HomeRight sprayer that I LOVE (albeit a WAY less impressive version of the one you used) but it has been “well loved” and is ready for retirement… But I’m not ready for it to retire as I have yet to find the bravery/courage to use it for interior walls and projects–or more like find the bravery and courage to tell my non-handyman husband about my plans! Lol I have been dying over the B&B look and yours is by far the best and easiest tutorial to follow–and with GORGEOUS results!!!!!
I would love to use this for my living and dining room. It would save me a ton of time!
My kitchen cabinets!
Wow! You did an incredible job!
You did a fantastic job!! It looks amazing!!
Would love to win!
First just wanted to say that this project turned out incredible! Really do love it and although doesn’t look “easy”, you definitely made it seem manageable! Paid project I am most intimidated by…of the many I need to tackle lol, is painting the outside of the house and trip and such. 2 story house and hasn’t been painted in at least a decade lol. We’ve only been here a year of that though ;).
Yeah, the outside of the house is a big project! If you’re wanting to repaint the outside, this is the sprayer you need -http://www.homeright.com/products/homeright-heavy-duty-paint-sprayer-titanium-series. The one I’m giving away is a fine mist, better for inside projects.
Would love to have this for some painting projects in our home. Thanks!
I’m intimidated by my change table project!
I would love to to tackle my kitchen cabinets but the thought of such a large project is terrifying.
Love the dining room. It turned out beautifully. Just curious what where the panels did you use for the back? Where did you get them?
They are flat panel boards that we bought at Lowe’s, here’s a link – http://www.lowes.com/pd_16605-46498-300_0__?productId=3015239&Ntt=
Hello! Do you happen to have any pictures of the caulking process? I know you linked it to the bathtub, but I’m hoping to see more details about how you caulked the B&B!
Thanks!
I don’t, I’m sorry. I’ve used this trick on all different surfaces though and it works every time! Just make sure to remove the tape while the caulking is still wet, otherwise the tape will rip it all off. :/
Hi Anna, I am wondering how much it cost to build, and paint the wainscoting in your dining room?
I don’t remember exactly but I think I remember it costing just under $300 for all the supplies and paint.
Love the idea. My only suggestion is the outlets and switches should have been removed from the box and then reinstalled after the boards were installed. The “plaster ears” rest on the on the surface of the boards and the covers would be flush.
What type of “board” so you use? Thanks so much for sharing.
Hi, Mary. I’m Anna’s assistant, Bethany. Here’s a link to the hardboard wall panels that Anna used. http://www.lowes.com/pd_16605-46498-300_0__?productId=3015239&Ntt= Hope this helps! 🙂
Looks good and gave me a few ideas but if I could make one suggestion as an electricIan? Next time you do something like this, pull your plugs and switches out before you put the wall board on, if you ever have to do it now it will be a real pain for 2 reasons. 1 you can’t get to the screws and 2 the strap of the device is behind the board so you will have to cut above and below the device to get it out.
Additionally the electrical code requires no combustible material to be within the confines of the box or cover. There are these things called device box extensions that are required if combustible material is exposed to the interior of the box which prevents it from burning if there is a loose connection or something else that causes the device to burn up.
Other than that, thanks for some good ideas.
Blessings
Geoff
Love how the white color pops. What white color did you use?
Just pure white straight from the can, no tint, in high gloss.