After posting the design board for my front porch makeover many of you asked me questions about how I made it and what program I had used. So today I thought I’d give a little rundown on how I like to create a design board. Now that I’ve made over the front porch I’m itching to do the entryway, so I will use that as my example room today.
Step 1: Finding Inspiration
This first thing you need is inspiration. I like to get inspired for a space by going on Pinterest and searching for key words related to my project. For example, for this project I would look up words like: Entryway, Board and Batten, etc. As you find images you like save them to a specific Pin Board for that project.
Step 2: Choosing a color scheme
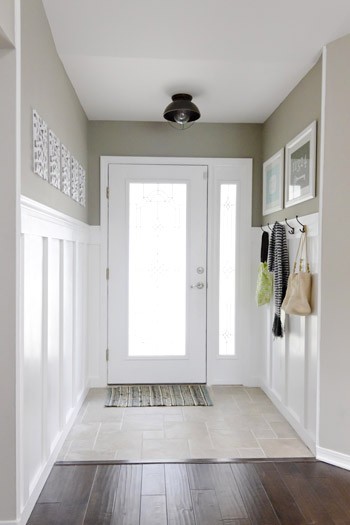
I have a very nontraditional way of choosing my color schemes. As I search through pages and pages of Pinterest I start to notice a theme of colors that stand out to me. For example when putting together this design board I noticed that images like this one kept jumping out at me.
Then what I do is gather a couple pictures, that are very similar in colors, and I “chip” them using the awesome {and addicting} Sherwin Williams Chip It! tool.
I chipped the picture above and here’s what it looked like.
It wasn’t exactly what I was looking for because I don’t want the room to be all gray and white, so I moved onto another picture that had similar colors but it also had some pops of color.
Step 3: Pick your Favorites
Now that you have your colors picked out, and a Pin Board full of inspiration, it’s time to narrow it down and pick your favorites. Scroll through your Board and save pictures of anything you MUST HAVE in your room. Since I’m doing my Entryway I need to pick out what I wanted to do with the walls, where I was going to put all the shoes, artwork, etc.
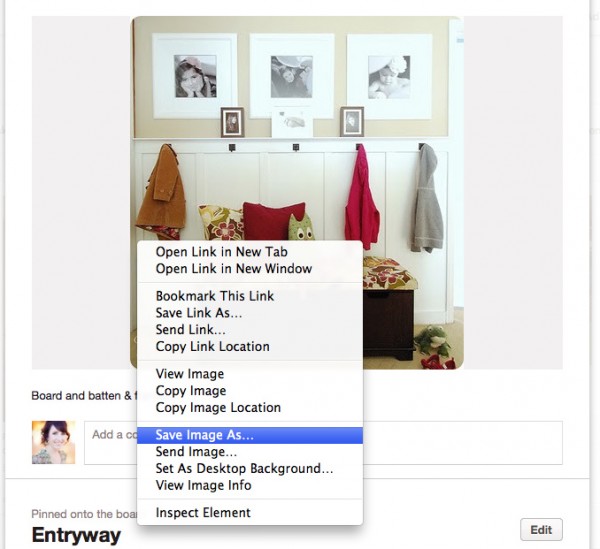
As you decide on your “must haves” for the room, save the pictures to your computer, in a specific folder, that way you’ll know where to find them. I’ll call my folder “Entryway Makeover”. To save pictures to your computer right click on the image and select “Save Image As”.
Step 3: Collage
Next you will need to gather those images in your photo editing software. For this type of project I like to use Picasa because it’s free and it’s really easy to use. If you don’t already have Picasa you can download it here.
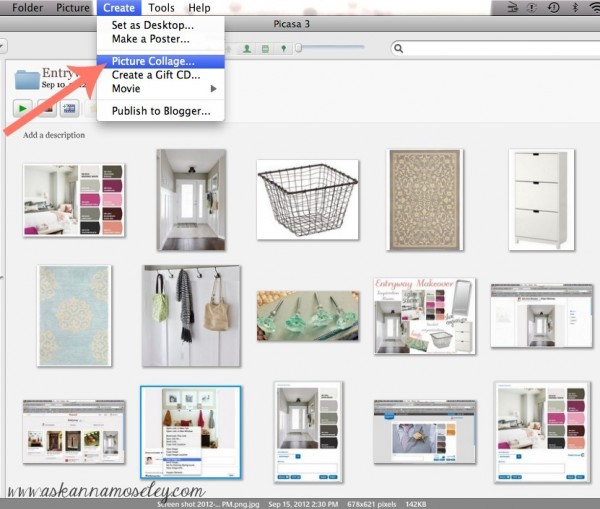
Once all of the images are in Picasa you are ready to create your design board. In the toolbar at the top, select “Create”. From the drop down menu select “Picture Collage”.
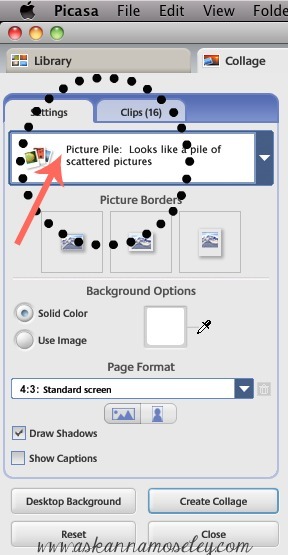
When it takes you to the collage screen make sure that “Picture Pile” is the selected style. This collage style will allow you to place the pictures wherever you want them on the page.
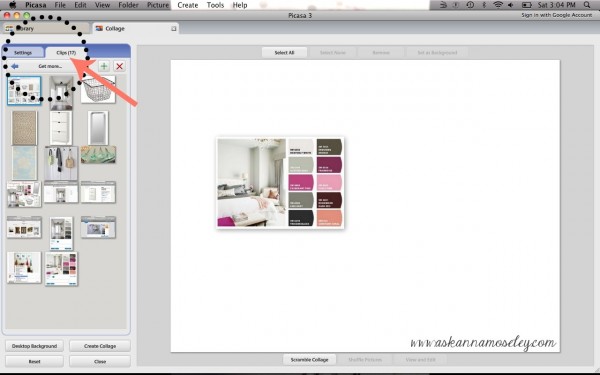
After you have selected the Picture Pile layout, select the “Clips” tab at the top to take you to the pictures in your file.
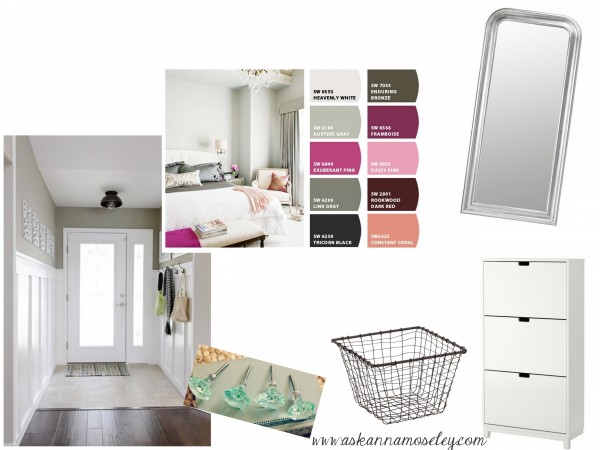
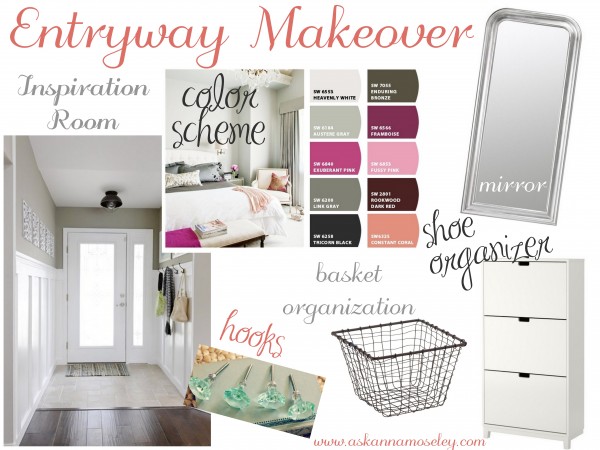
Now is the fun part! Start adding all the pictures, of your “must have” items, to your collage. Make sure that when you’re adding the pictures that you leave plenty of room for words. When we are done adding the pictures we’ll add labels so when people look at it they know what everything is for. Here’s what mine looks like.
Save the collage by selecting “Create Collage,” then the program will take you back to your album.
Step 4: Finishing touches
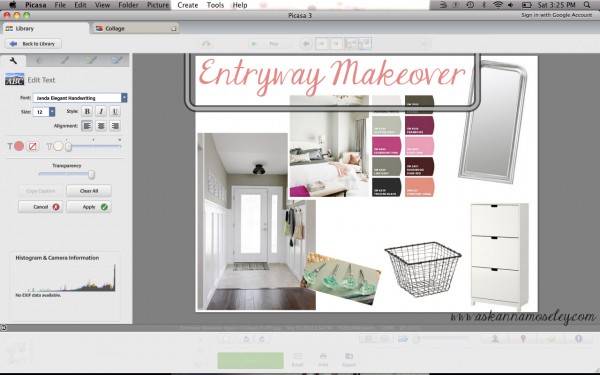
Now that the collage is finished it’s time to add all the words. One of the things I love about Picasa is that it lets you use any font that’s on your computer so you can download all kinds of cute fonts from dafonts.com.
I always start by giving my Design Board a title so that when I go back and look through them, it’s easy to know which board was for which room.
Continue to add titles to your design board, until everything has been labeled. I like to use different fonts and colors, that all coordinate with my color scheme, it’s my way of “decorating” my design board. {smile} Here’s what my finished board looks like.
Step 5: Make it come to life
Next is the fun part, making your design board come to life! Go shopping, order items online, purchase paint, etc., and always have your design board in the back of your mind, or print it out and take it with you!
The most important thing is to have fun with it! Be creative and make it your own. I can’t wait to see your designs!
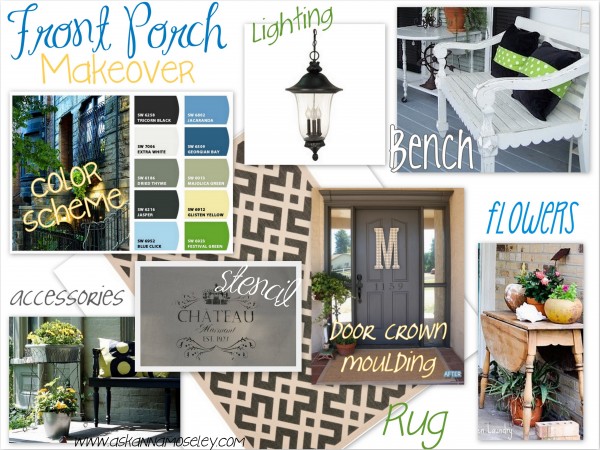
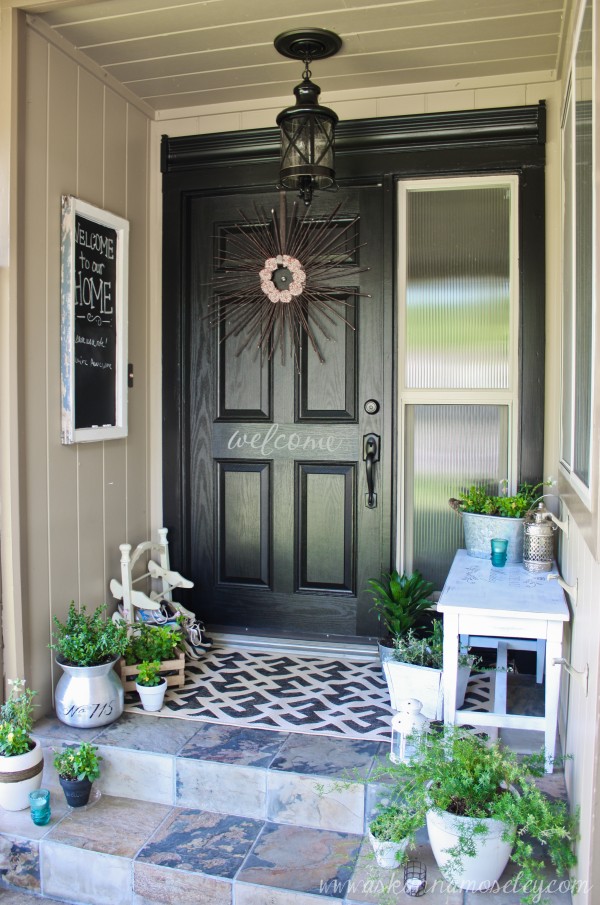
Here are a couple of my design boards and the finished projects:
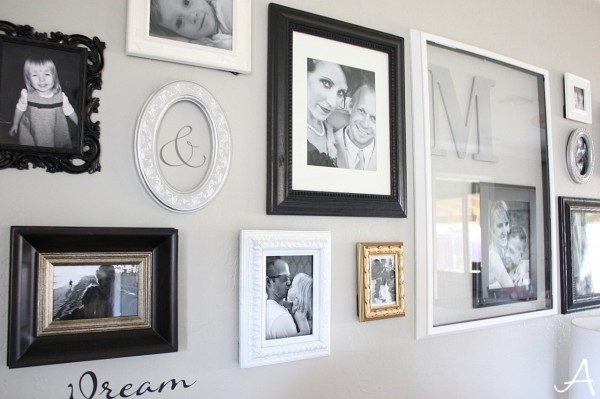
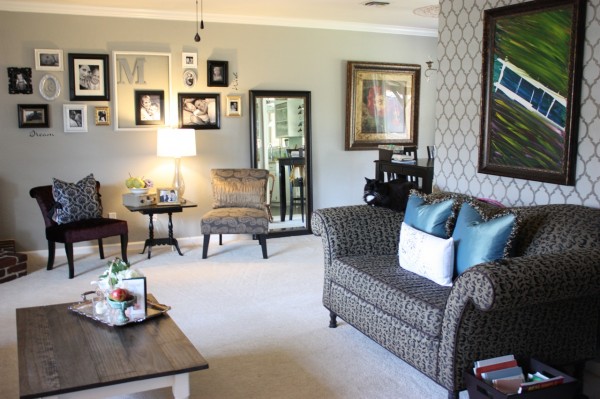
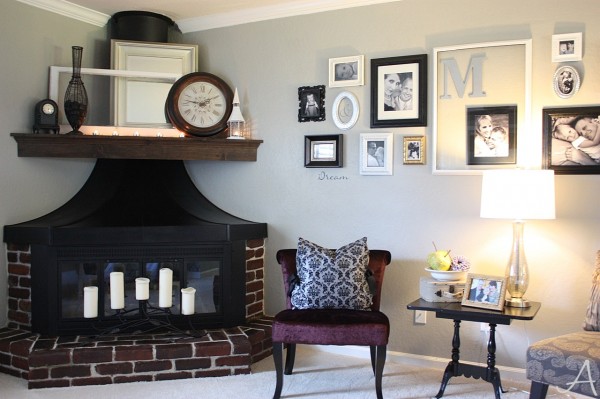
Here is my living room design board. I did this one a long time ago before I was using Picasa to create my design boards, that’s why it’s not as creative-looking. 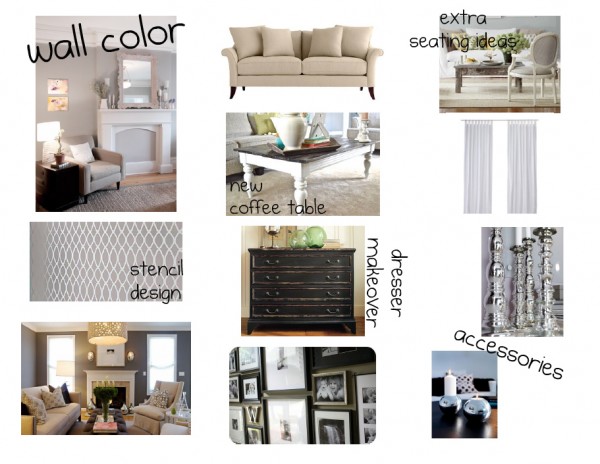



Great post -thanks for sharing. I can’t wait to try out that Chip It tool!
Great tutorial and resources, thanks Anna!
Anna, thanks for sharing such a wonderful tutorial! I already use Picasa and Pinterest, so this should be a cinch. I can’t wait to create a design board!
What a *spectacular* post! Thank you so much! 🙂
Warmly,
Sara
Love it – very great ideas! I can do something similar in PicMonkey but you’ve got me thinking about doing that! Good job 🙂
Becky B.
http://www.organizingmadefun.com
Organizing Made Fun
Thanks Becky! 🙂
Anna – great post! I really like your idea of using the Chip It! tool to find colors – good thinking! 🙂
Thanks Beth! I love the Chip It tool, it has been so helpful! 🙂
Great info, Anna!
Thanks Mary Beth! 🙂
Thanks so much for showing how you made your design board! Your home is lovely!
Thank you Steph!
Hello!
I just wanted to stop in to say that I love your blog, I have so many of your household tips on my Pinterest. Anyways, I wanted to stop in to tell you that I used your Design Board Tutorial to create a design board for my kitchen, and I absolutely love it! I feel so much more organized and less overwhelmed. The Chip-It tool on Sherwin Williams is awesome too. I can’t wait to design other rooms now.
That is SO awesome! I love it when readers come back and tell me those things! Thank you for taking a minute to share. 🙂
Thanks for the tutorial — love your collage! I’ve used PicMonkey, but never Picasa before. It looks like you can drop a photo where you like in Picasa, instead of having to pick a standard layout — I like that! Will have to give it a try. Thanks again.
Thanks Lauren! Picasa is super easy to use, I think you’ll love it!
Hi Anna, I just wanted to thank you for your wonderful post. I am new to the wonderful world of blogging and needed some help creating a design board. I just completed my first one and posted it to my blog! Very excited. I also put a link in my post to your wonderful site so I could credit you for the idea! (hopefully I did it correctly!) Thanks again! Dainelle 🙂
Thank you so much Danielle! Welcome to the blog world. 🙂
Thanks for sharing! 😀
Ps: what’s that pattern called on the wall where your fireplace is? I saw that in an invitation design and I wanted to know what it was called!
Here is the link for the stenciled wall –>https://askannamoseley.com/2012/01/living-room-accent-wall-with-cutting-edge-stencils/
Awesome! Thanks so much! Moroccan dream it is! 😀
Thank you! I know I’m late but I just discovered your blog:)
Thanks so much for your tutorial! I am totally NOT A COMPUTER PERSON and I was able to create a couple boards. Not proficient by any means, but I did it!
Thank you!!!
Kate
Thank you so much for the great post! I loved following your instructions and making my own design board!! So easy and so fun!! I will be doing this a lot as I re-decorate!
I just created a picture board for my apt using your instructions. Thank you!!
Awesome!! 🙂
I love Blogland! This post is still fresh even after over a year! Great Tutorial Thanks for sharing!!!!
hi anna its very good design thanks
This is an awesome post full of great tips. Glad to be a new follower 🙂 🙂
Tiffany
http://thiswholehouse.blogspot.com
Thank you SO much for sharing Anna! I am new to this whole blogging thing and this tutorial was a huge help! What a wonderful tool to help me not only share what I’m imagining for my space, but to help me visualize it all together for myself too! The Chip It was pretty neat to play with too! I put it all to work with my very first project in my new house (and on my new blog too) – http://makingitinthemountains.wordpress.com/2014/03/04/carsons-bedroom-heres-the-plan/
Thanks again Anna!
-Kristi
Very helpful! I will give this a go. Great step-by-step directions.
What do you use now that picasa is no longer available?
Once picasa went away I started using the free version of PicMonkey. 🙂