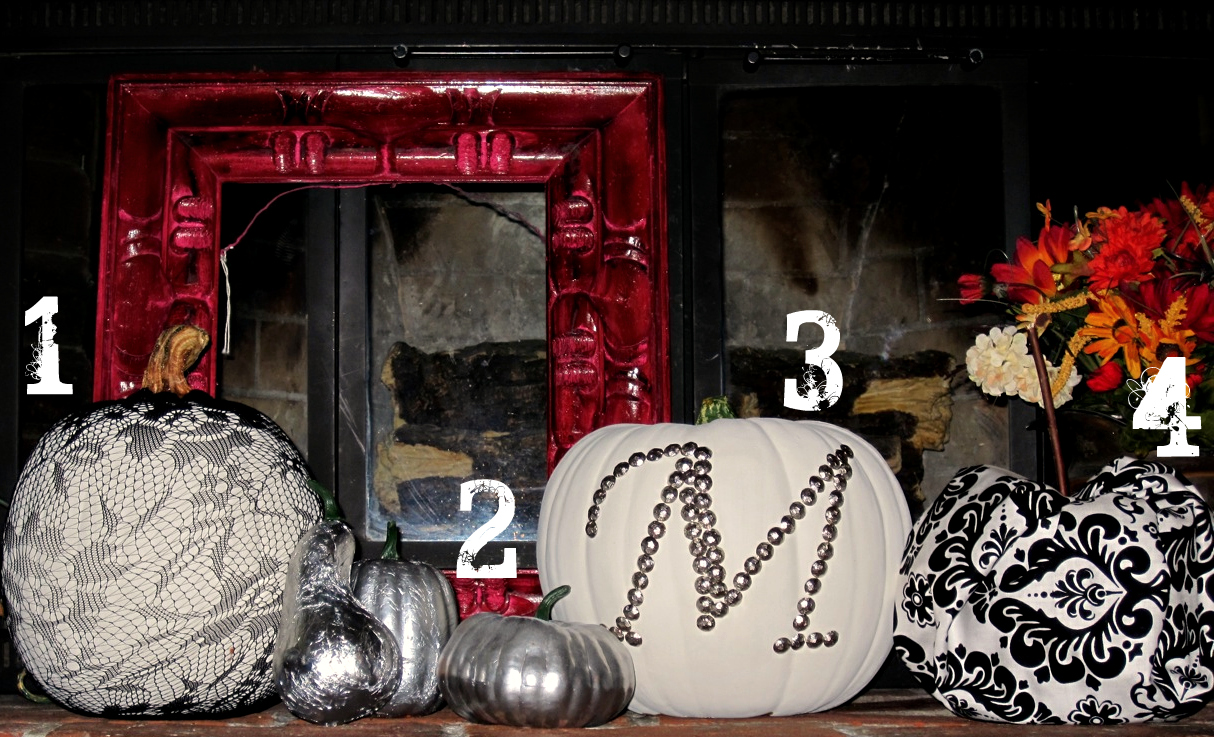
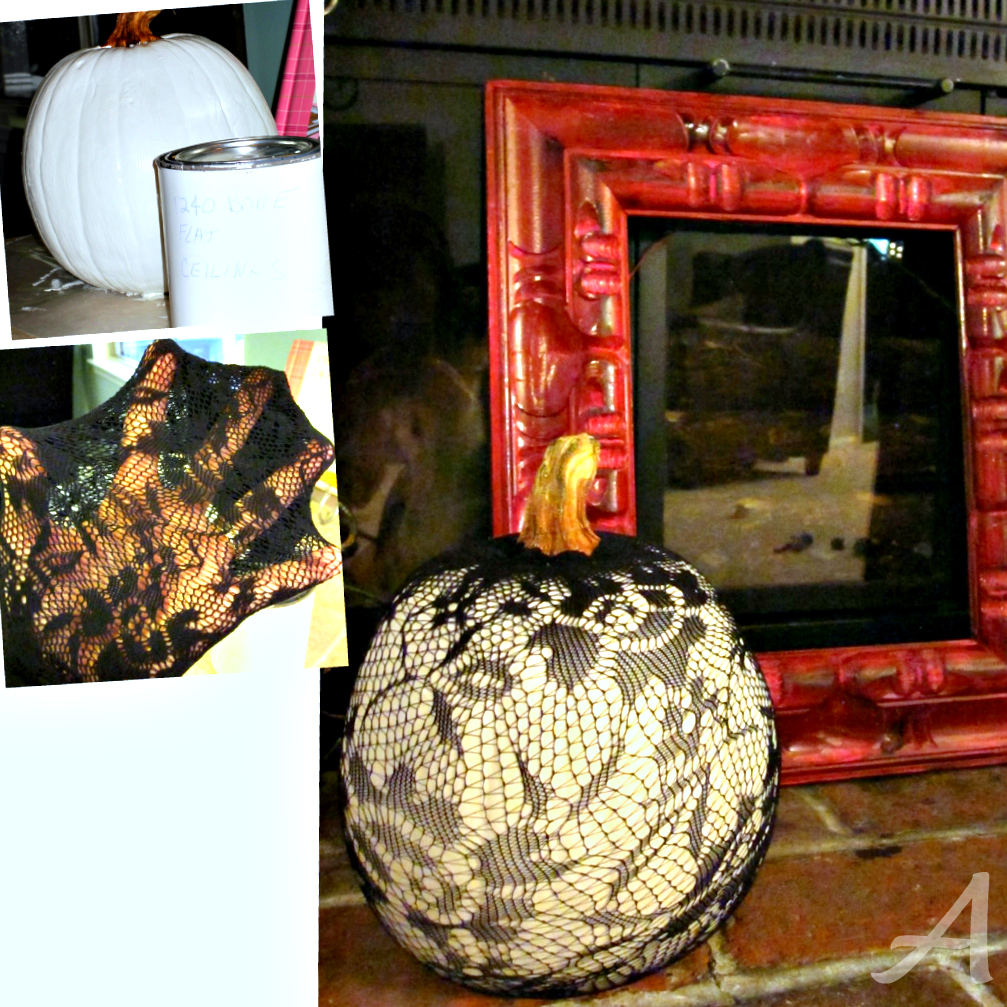
1. Here is what you will need to create this elegant, lacey pumpkin: small to medium size pumpkin (real or fake), white paint, paintbrush, decorative nylon/stocking, and a glue gun. First start by painting the pumpkin white. For this next step you will need two people. After it has completely dried have one person hold the pumpkin and the other stretch the nylon/stocking over the pumpkin, starting with the toe at the bottom of the pumpkin. Once the pumpkin has been covered by the nylon/stocking gather the excess at the stem and cut it off. Using the glue gun glue the edges of the nylon/stocking around the stem. Voila! Now you have an elegant pumpkin that the neighbors are sure to love. I love mine so much that I had to keep it in the house so that I could look at it all the time.
2. To create these shiny silver pumpkins you will need: fake pumpkins, silver spray paint, craft glue and silver leafing. Start by removing the stems of the pumpkins. Take the pumpkins outside and spray them with the spray paint. Once they are dry bring them back in the house and coat them with a layer of craft glue. Very carefully line them with the silver leafing and then apply another layer of glue. I applied the silver leafing in layers so that my pumpkins would turn out with texture and not be completely smooth. Once the glue has completely dried replace the stems. Now you have pumpkins that are not just pretty but they are also very expensive-looking.
3. The monogrammed pumpkin is very simple and easy to create. You will need a fake pumpkin, paint (whatever color you prefer), paintbrush, a print out of the letter you wish to monogram and upholstery nails. First paint the pumpkin and allow it to dry completely. Next, tape the printed letter onto the pumpkin. Then stick the upholstery nails into the pumpkin following the shape of the letter. Once you are finished remove the nails, then remove the letter. Replace the nails in the holes left in the pumpkin. Now you have a pumpkin that is beautiful and personalized just for your family!
4. The last design I have to share with you is the most simple. What you will need to create this pumpkin is a square piece of fabric (whatever style you prefer), a three inch stick, and a roll of toilet paper. Yep, that’s right, toilet paper! Start by laying the fabric square on a flat surface. Place the roll of toilet paper in the middle. Take two of the corners that are opposite of one another, and bring them up to tuck them into the center of the toilet paper roll. Do the same with the last two corners of fabric. Once the corners are all tucked in and the fabric is laying the way that you’d like it to, take the palm of your hand and smash the toilet paper roll down so that it doesn’t look like a roll of toilet paper covered in fabric. Next fluff the fabric at the top to give it a rounded “pumpkin” look. The last step is to place the stick in the middle to give the pumpkin a stem. These are easy and inexpensive to make, and they would be fun to make with your kids!
Now it’s time to head out and buy some pumpkins! If you have other creative ways to decorate pumpkins I would love to see them.


Hi Anna, I just wanted you to know I featured you with a link back on my post “Top 10 Creative Pumpkins” at inspiringhomestyle